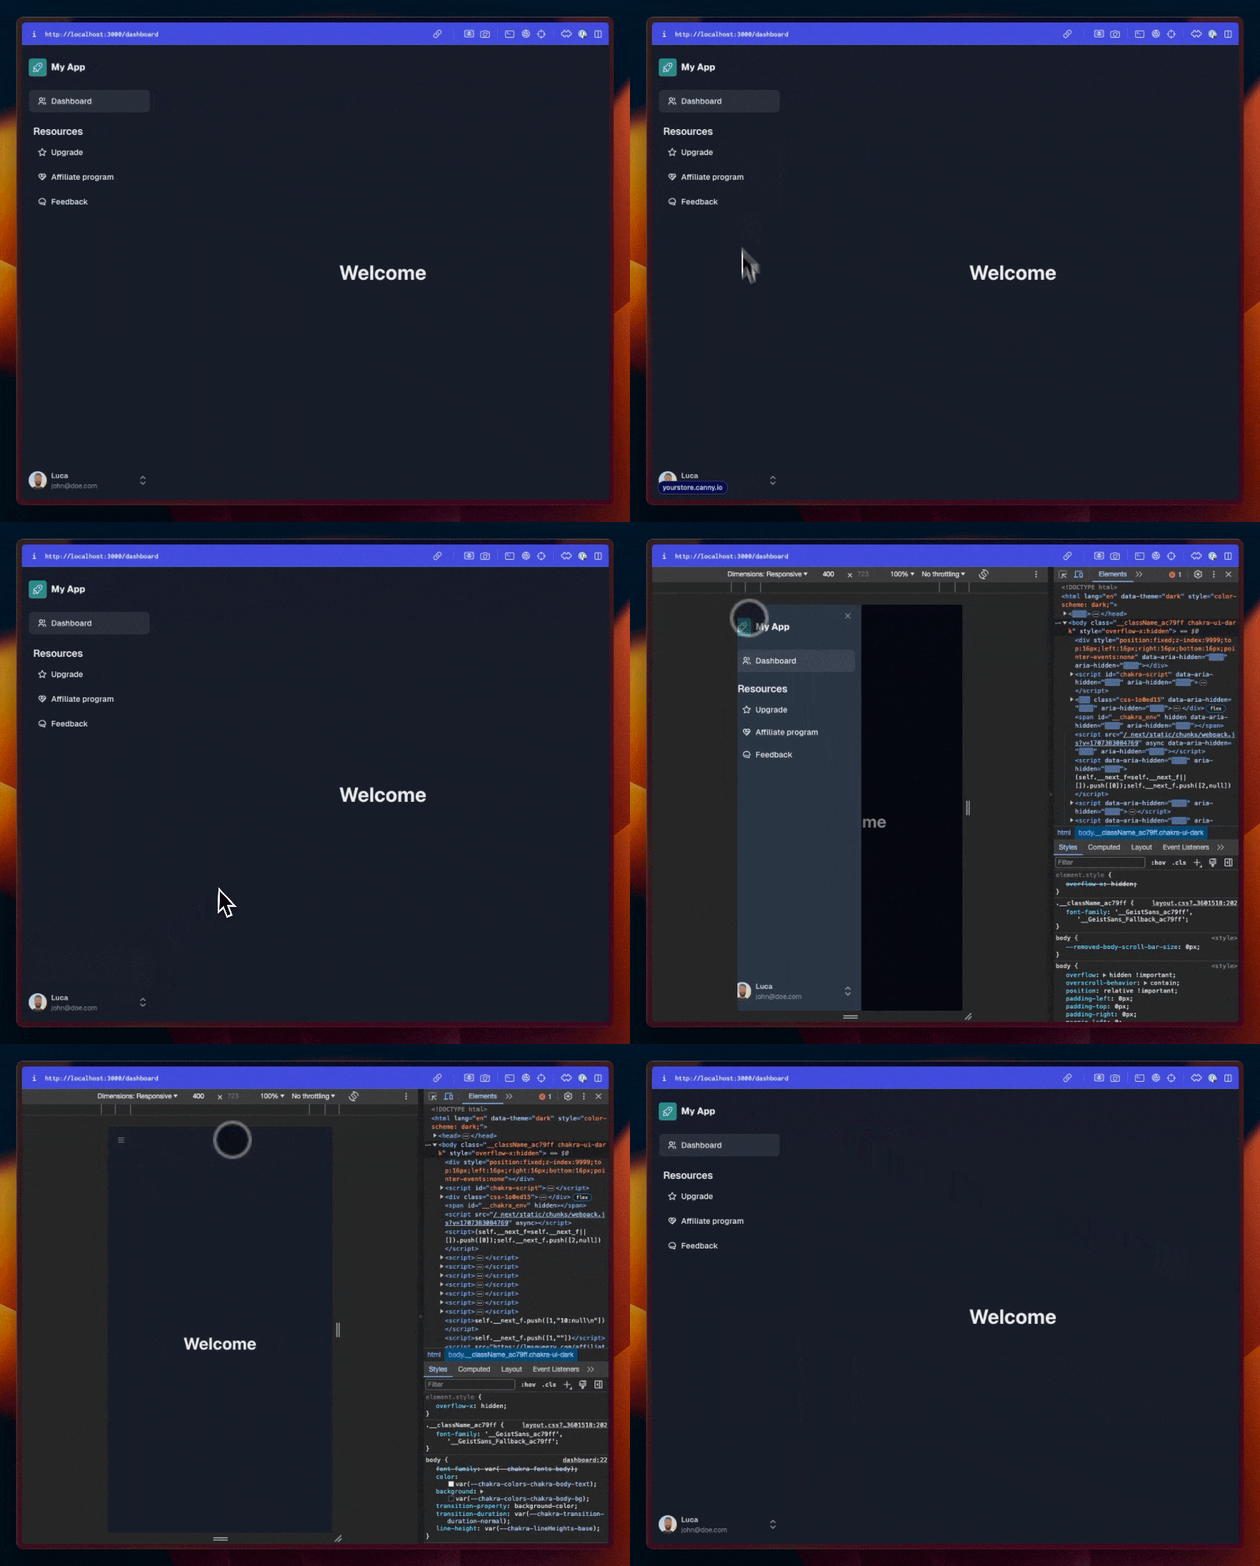
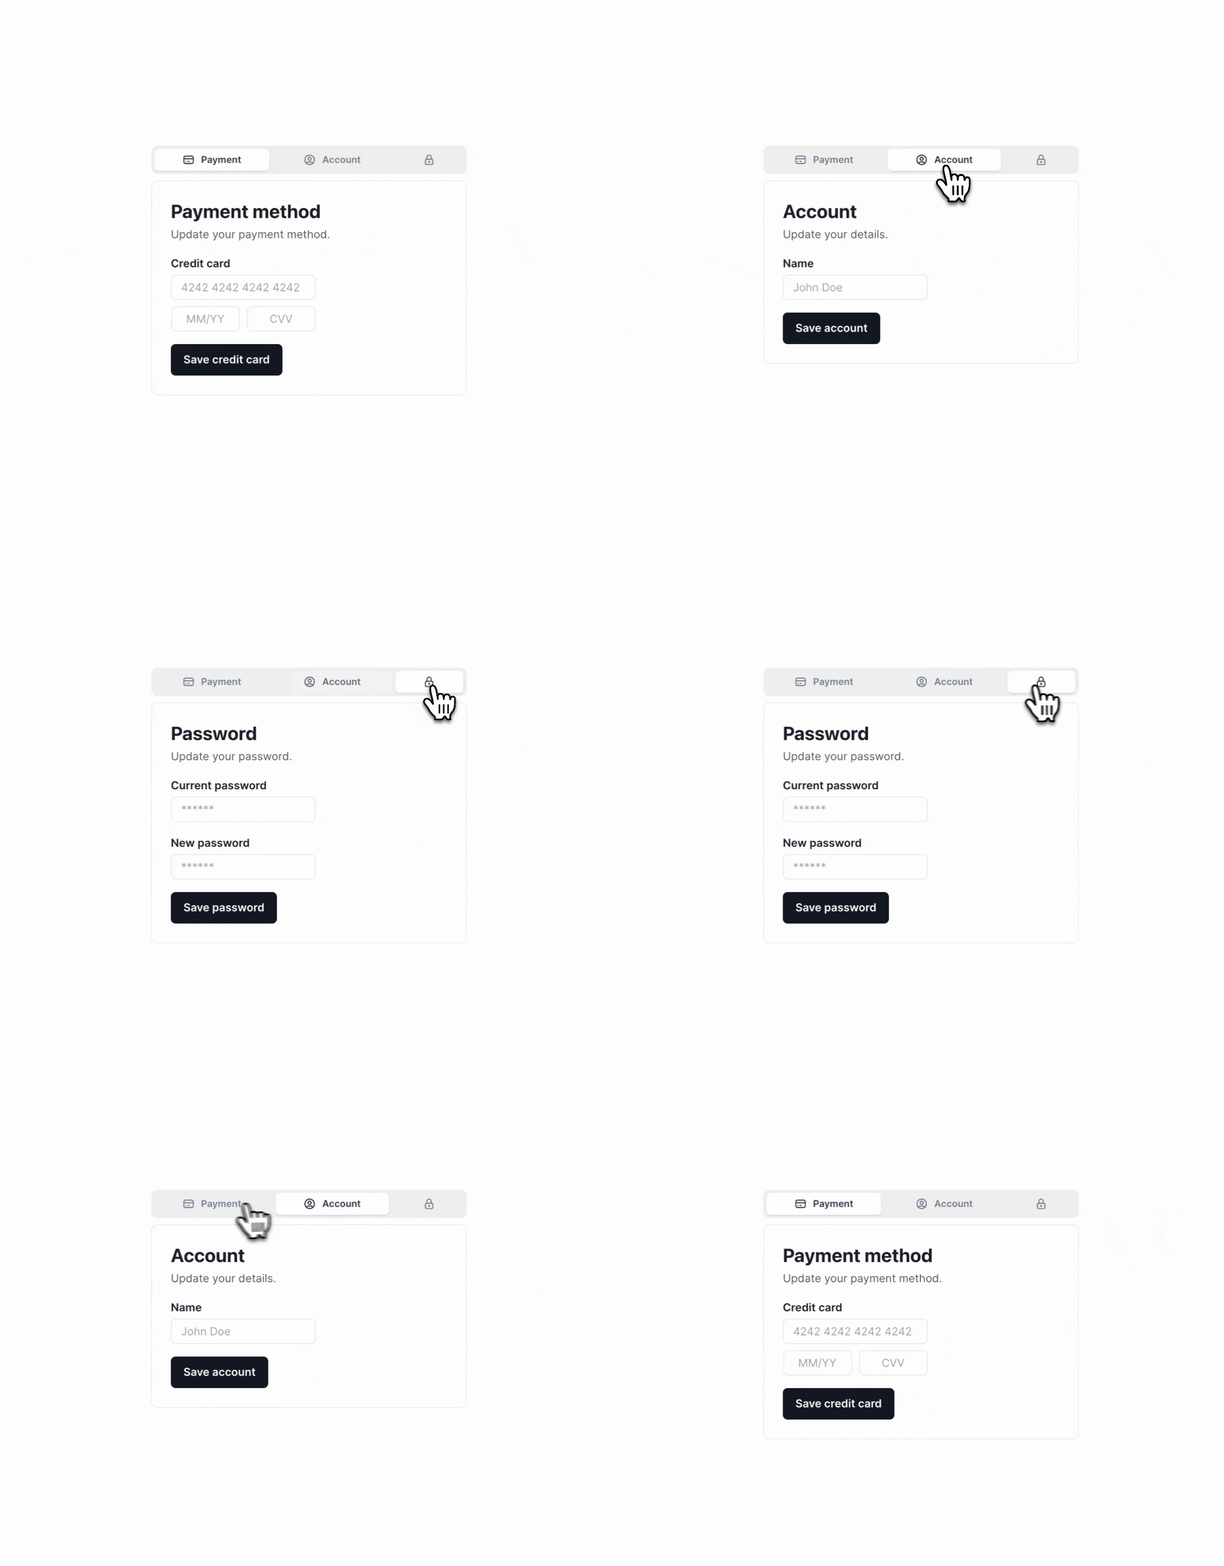
# Get started
Get started in 5 minutes
Welcome to Shipped, the NextJS boilerplate to launch your SaaS in days!
**Shipped** code is on GitHub, so start by forking the repo.
If you have purchased the **Startup** package go to this page and click on the Fork button:
```bash
https://github.com/ShippedBoilerplate/shipped
```
If you have purchased the **Startup + Chrome Extension** package go to this page and click on the Fork button:
```bash
https://github.com/ShippedForBrowserExtensions/shipped-browser-extensions
```
In the fork form, select the owner (your GitHub user), uncheck the option "Copy the `main` branch only", and click on **Create fork**.
{% hint style="info" %}
**Why forking?**
When you create a fork, you own the new repository, while your fork keeps a link to the original repository.
This means that if I update the Shipped boilerplate code, you can integrate the latest changes with the click of a button.
In your repository, you will find a button on GitHub called "Sync Fork" that allows you to integrate the changes I make in the original repository at any time!
{% endhint %}
Now it's time to clone the forked repository.
Go to your forked repository on GitHub, click on the "Code" button, and select "Open with GitHub Desktop" for the easiest way to download the repository to your local computer.
Instead, if you're familiar with the git CLI, use the command `git clone git@github.com:`.
Finally open a terminal, go to the folder you cloned the repository into, and run:
{% code title="terminal" %}
```bash
cp .env.example .env # copy the env file
npm i # install the dependencies
npm run dev # start the local next.js server
```
{% endcode %}
At this point, your product is running at [`http://localhost:3000`](http://localhost:3000)
Point your browser to that page, and see it in action! 🚀
Pretty exciting, right?!
## Configuration
Check the [Configuration](/other/configuration) page to configure your web app (mandatory for most of the features).
## NodeJS Version
To correctly run Shipped, you need to use the version of NodeJS 20.10.0
To enforce it, the repository includes a `.nvmrc` file.
NVM is the Node Version Manager that you can download [here](https://github.com/nvm-sh/nvm).
To activate the correct NodeJS version, go to the Shipped folder and run
{% code title="terminal" %}
```bash
nvm install 20.10.0
nvm use
```
{% endcode %}
{% hint style="success" %}
**Pro tip** Install the [script to automatically switch nodejs version](https://github.com/nvm-sh/nvm#calling-nvm-use-automatically-in-a-directory-with-a-nvmrc-file) when you move to a folder with a `.nvmrc` file.
{% endhint %}
\
Common next steps:
* Configure a [database](/features/database)
* Configure [authentication](/features/authentication)
# Make a waiting list
If you are still building the product, while talking to the potential customers, it might be a good idea to create a waitlist.\
\
You'll be able to evaluate if people are interested in your value proposition, and onboard new users progressively.
To create a waitlist landing page, open `src/app/page.tsx` and paste this:
```typescript
import { ExplainerVideo } from "@/components/ExplainerVideo/ExplainerVideo";
import { FAQ } from "@/components/FAQ/FAQ";
import { Features } from "@/components/Features/Features";
import { Footer } from "@/components/Footer/Footer";
import { Header } from "@/components/Header/Header";
import { Hero } from "@/components/Hero/Hero";
import { Waitlist } from "@/components/Waitlist/Waitlist";
export default function Home() {
return (
<>
);
}
```
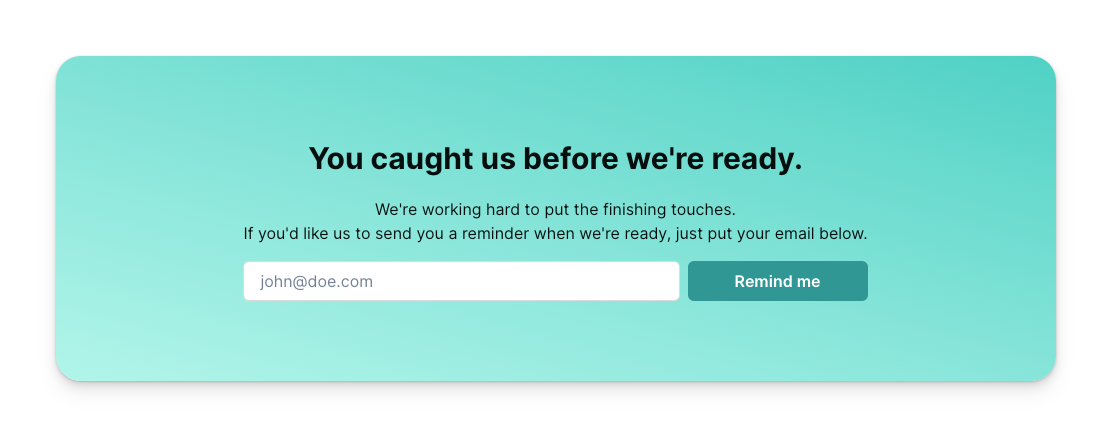
You will get a page like this:
To learn how to plug your email service, see the [Waitlist component docs](/components/waitlist).
# Launch a pre-sale
Create a pre-sale landing page
Pre-sales are a great way to validate your product.
It consists of a landing page that shows the problem solved and the features of your future product, and it proposes a lifetime deal to pre-order your product.
This is the best validation possible, you collect money (strong validation) even if you don't have the product built.
{% hint style="info" %}
I suggest you invite the buyers of the lifetime deal into a community (Slack, Discord, Telegram), they represent your early users and can give you tremendous insights about what to build and which problems to solve.\
Shape your product based on their feedback.
{% endhint %}
To create a pre-sale page, open `src/app/page.tsx` and paste this:
```typescript
import { ExplainerVideo } from "@/components/ExplainerVideo/ExplainerVideo";
import { FAQ } from "@/components/FAQ/FAQ";
import { Features } from "@/components/Features/Features";
import { Footer } from "@/components/Footer/Footer";
import { Header } from "@/components/Header/Header";
import { Hero } from "@/components/Hero/Hero";
import { Lifetime } from "@/components/Lifetime/Lifetime";
export default function Home() {
return (
<>
);
}
```
You'll get a page like this:
Pre-sale landing page
To know more about the lifetime deal customize, check the [Lifetime component docs](/components/lifetime).
# Build a SaaS
With Shipped you get a solid starting point to build your own SaaS (Software as a Service).\
\
Shipped comes with subscription plan support and subscription lifecycle built-in (Lemon Squeezy webhooks).
To create a SaaS landing page, open `src/app/page.tsx` and paste this:
```typescript
import { CtaBox } from "@/components/CtaBox/CtaBox";
import { ExplainerVideo } from "@/components/ExplainerVideo/ExplainerVideo";
import { FAQ } from "@/components/FAQ/FAQ";
import { Features } from "@/components/Features/Features";
import { Footer } from "@/components/Footer/Footer";
import { Header } from "@/components/Header/Header";
import { Hero } from "@/components/Hero/Hero";
import { Pricing } from "@/components/Pricing/Pricing";
import { Testimonials } from "@/components/Testimonials/Testimonials";
export default function Home() {
return (
<>
);
}
```
You'll get a strong foundational landing page with all the blocks you need to convince people to sign up and buy your product.\
\
Hero section, Explainer Video (record yourself demoing the product — I suggest [ScreenStudio](https://screenstudio.lemonsqueezy.com?aff=O9Xdy) for screen recording), Features, Testimonials, Pricing, FAQs, Call To Action.
SaaS landing page
At this point, you just need to configure the subscription plans on Lemon Squeezy and configure Shipped. See the [Pricing component docs](/components/pricing).
# Create your store on Lemon Squeezy
[Lemon Squeezy](https://www.lemonsqueezy.com/) makes it incredibly easy to create a store, add your products, and start selling them.
The types of services supported by Lemon Squeezy are but are not limited to eBooks, PDFs, design assets, photos, audio, video, SaaS/software companies, premium courses, membership sites, etc.
Lemon Squeezy (LS) is a Merchant of Records. It means that, compared to Stripe (a payment processor), LS deals with taxation across borders, for you! Remove the headache of managing the taxation, you only need to pay your own taxes for your country of residence (consult a local accountant to learn more).
This is why Lemon Squeezy is my default choice when I start a new product.
The LS store approval process usually takes 1-2 business days, but mines were approved in less than 24 hours.
Follow this checklist before submitting your store for activation:
* Buy a domain using [Namecheap](https://www.namecheap.com/) (or any other similar service).
* Be sure to have the landing page online (follow the [Deployment guide](broken://pages/E2wjT3CQv6hsTAcMtCzh))
* Be sure to have the Privacy Policy and Terms and Conditions pages in place.
You are now ready to activate your store on LemonSqueezy and start making money online!
{% hint style="success" %}
Share your product with me if you want it to be featured on the website of **Shipped**! 🚀
{% endhint %}
# AI Services
Shipped includes an AI Chatbot to showcase how you can integrate AI services inside your product.
You can open the AI Chatbot at `http://localhost:3000/ai-chatbot`
{% embed url="" %}
You can find the AI Chatbot UI in the file `src/components/pages/AIChatbot/AIChatbot.tsx` while the backend route is at `src/app/api/chat/[provider]/route.ts`.
This example AI Chatbot implementation shows how to use the AI Services **OpenAI**, **Anthropic**, an **Google Gemini**, but Shipped makes use of the Vercel AI SDK, which supports many other AI services, likes:
* xAI Grok
* Azure OpenAI
* Amazon Bedrock
* Google Vertex AI
* Mistral
* DeepSeek
* Perplexity
* Ollama
and many more. Check out the [official page](https://sdk.vercel.ai/docs/foundations/providers-and-models) for the full list of AI providers.
### Configuration
To use the AI Chatbot, you need to configure some environment variables:
* `OPENAI_API_KEY`
* `ANTHROPIC_API_KEY`
* `GOOGLE_GENERATIVE_AI_API_KEY`
You can generate the API Keys by creating an account on the relative AI services websites.
{% hint style="warning" %}
**Use Your Own Keys**
If you prefer to not provide your own AI service API Keys, but instead let the users provide their API keys, you can:
* add a modal to ask for the API Key
* save the API Key in the local storage of the browser
* update the backend request and endpoint to read the API Key from the body of the request
{% endhint %}
The Vercel AI SDK is a powerful library, and the [documentation](https://sdk.vercel.ai/docs/foundations/overview) describes a lot of uses cases and functionalities. I recommend to read it if you want to learn more about what's possible.
# Affiliate Program
Shipped is equipped with an Affiliate program page, designed to improve the conversion.
The affiliate program system is provided by Lemon Squeezy out of the box.
You only need to enable the affiliate program in your Lemon Squeezy store and configure your affiliate link in the file `config.ts` into the variable `affiliateProgramLink`.
## How to activate your affiliate program
1. Activate and configure Affiliates on the [Lemon Squeezy Portal](https://app.lemonsqueezy.com/affiliates).
2. Open `config.ts` and update `affiliateProgramLink` (replace `yourstore` with your LS store name).
3. Set `` in the file `LemonSqueezyAffiliateScript.tsx`:
```javascript
window.lemonSqueezyAffiliateConfig = { store: "" };
```
The Lemon Squeezy tracking script is already included in the provider component, when a user lands on your website from an affiliate link, and they subscribe, they will be automatically counted as conversions from an affiliate.
{% code title="src/app/providers.tsx" %}
```tsx
export function Providers({ children }: { children: React.ReactNode }) {
return (
// <-- LS tracking script
{children}
);
}
```
{% endcode %}
# Analytics
Collect the basic analytics with a privacy focused analytics tool
## Pirsch
### Setup
1. Create a new site on [Pirsch](https://pirsch.io/ref/beJar7BgQM)
2. Set the data-code in the Pirsch script tag in `layout.ts`
```html
```
### Safe routing
Some browsers and ad-blockers might block the requests to the Pirsch javascript file.
To avoid that, **Shipped** includes a rewrite rule in `next.config.js`
```javascript
async rewrites() {
return [
{
source: "/pirsch-extended.js",
destination: "https://api.pirsch.io/pirsch-extended.js",
},
];
},
```
This rule is already included, so no action from you is required.
### Extra
Pirsch allows you to track specific events on the page. See the [documentation](https://docs.pirsch.io/advanced/events?ref=shippedclub).
## SimpleAnalytics
[SimpleAnalytics](https://www.simpleanalytics.com/?ref=shippedclub) is another popular analytics product.
To enable add this code to the `layout.ts` file
```typescript
import Script from "next/script"
export default function RootLayout({
children,
}: {
children: React.ReactNode;
}) {
return (
/* ... */
{children}
);
}
```
Then update `next.config.js`
```javascript
async rewrites() {
return [
{
source: "/simple-analytics.js",
destination: "https://scripts.simpleanalyticscdn.com/latest.js",
},
{
source: "/simple-analytics-noscript.gif",
destination: "https://queue.simpleanalyticscdn.com/noscript.gif",
},
];
},
```
# Authentication
**Shipped** supports [NextAuth](https://next-auth.js.org/) and Supabase to handle user authentication.
With NexAuth you can create two types of authentications, Magic Links and Social Authentication which includes using Google, Twitter, Facebook, LinkedIn, Slack, and 60+ more services to sign up your users.
With Supabase Auth you get Magic Link Auth, Email and Password Auth, and Social Authentication.
If you intend to use Supabase, follow [this guide](/features/supabase), for NextAuth continue reading.
## NextAuth
The authentication logic resides in `src/config/auth.ts`.\
In that file, you define the authentication providers to use.
### Sign-up and login pages
**Shipped** provides Sign-Up (/signup) and Login (/login) pages out of the box.\
Feel free to customize them according to your needs.
Sign-Up page /signup
Login Page /login
## NextAuth Setup
Add this to your `.env` file:
```
NEXTAUTH_URL="http://localhost:3000"
NEXTAUTH_SECRET="4348yhu34h3ui4ofjndfsdfeirh4b637u5sfd3"
```
{% hint style="info" %}
The NEXTAUTH\_SECRET is a random string of at least 10 characters, used to encrypt.
You can generate a secret using the [Shipped Generator](https://shipped.club/free-tools/secret-password-generator).
{% endhint %}
## NextAuth Authentication methods
{% hint style="info" %}
Authentication needs a database to store the user's authentication information. [Configure a database](/features/database) if you haven't already.
{% endhint %}
### NextAuth Magic Links
Magic Link Auth is a mechanism that sends an email to the user whenever they want to sign up or log into your product. You define for how long the link will be valid (24 hours or more).
To use this authentication method, you need an email SMTP server.
I use [MailPace](https://mailpace.com/) to send transactional emails, and they provide an SMTP server as well.
But you can use [MailChimp](/features/authentication/mailchimp), [Loops](/features/authentication/loops), [AWS SES](/features/authentication/aws-ses), [SendGrid](/features/authentication/sendgrid), or any other email provider.
Add this provider to the NextAuth configuration (`src/config/auth.ts`).
```typescript
EmailProvider({
server: process.env.MAILPACE_EMAIL_SERVER || "",
from: process.env.EMAIL_FROM || "",
// maxAge: 24 * 60 * 60, // How long email links are valid for (default 24h)
}),
```
Remember to configure the environment variables `MAILPACE_EMAIL_SERVER` and `EMAIL_FROM` into the `.env` and Environment settings of your hosting service.
{% hint style="info" %}
The value of `MAILPACE_EMAIL_SERVER`has this format
`smtp://username:password@smtp.mailpace.com:2525`
and you can retrieve your values for username and password from MailPace in the tab **API Tokens** > **SMTP Server Details**
{% endhint %}
### NextAuth Google Auth
Google Sign-Up is one of the most popular authentication methods.
To enable it you need to:
1. Create a new project on [Google Cloud](https://console.cloud.google.com/)
2. Go to **APIS & Services** then **Credentials**
3. Click on **Configure Consent Screen**
4. Fill in all the info.
5. Add `userinfo.email` and `userinfo.profile` to scope
6. Submit
7. Go to **Credentials** and click "Create Credentials", then "OAuth Client ID"
8. Select "**Web Application**"
9. Add and into the Authorized JavaScript Origins.
10. Add and to Authorized redirect URLs.
11. Click Submit
12. Copy and paste the Client ID and Client Secret into the `.env` file:
```yaml
# for Google Sign up
GOOGLE_CLIENT_ID=""
GOOGLE_CLIENT_SECRET=""
```
13. Go to "OAuth Consent Screen" and click "Publish App".
Google might request you to verify your domain in [Google Search Console](https://search.google.com/search-console). It requires you to configure a CNAME or TXT DNS record.
14. Open `src/config/auth.ts` and add this provider
```typescript
GoogleProvider({
clientId: process.env.GOOGLE_CLIENT_ID || "",
clientSecret: process.env.GOOGLE_CLIENT_SECRET || "",
}),
```
### More authentication providers
NextAuth supports 60+ authentication providers.
Some examples:
* Atlassian
* Twitter / X
* Facebook
* Instagram
* Apple
* Amazon Cognito
* Discord
* GitHub
* GitLab
* Medium
* Salesforce
* Spotify
* Twitch
* Zoom
Check the [documentation](https://next-auth.js.org/providers/) to learn how to integrate other third-party sign-in methods.
# MailChimp
Use MailChimp to send Magic Link emails
First of all, configure MailChimp.
For this to work you only need the `MAILCHIMP_API_KEY` environment variable configured.
[Follow this guide](/features/emails#create-your-api-key) to set it.
Open `src/config/auth.ts` and set
```typescript
import { emailFrom } from "@/config";
import { sendTransactionaEmail } from "@/libs/mailchimp"
/* ... */
providers: [
EmailProvider({
async sendVerificationRequest({identifier: email, url}) {
await sendTransactionalEmail({
to: email,
from: emailFrom,
subject: "Sign In to MyApp",
text: `Please click here to authenticate - ${url}`,
})
},
})
],
```
# Loops
Use Loops to send the Magic Link email
{% embed url="" %}
Using Loops to send Magic Link emails — Video tutorial
{% endembed %}
First of all, configure Loops.
For this to work you only need the `LOOPS_API_KEY` environment variable configured.
[Follow this guide](/features/emails#create-api-key) to set it.
## Configure Auth to use Loops for Magic Link
Open `src/config/auth.ts` and set
```typescript
import { emailFrom } from "@/config";
import { sendTransactionalEmail } from "@/libs/loops"
/* ... */
providers: [
EmailProvider({
async sendVerificationRequest({ identifier: email, url }) {
await sendTransactionalEmail({
transactionalId: "", // the transactional id you created on Loops
email,
dataVariables: {
url, // change it to the variable you set in the Loops transactional
},
});
},
}),
],
```
## Create a Transactional in Loops
Log in to Loops and go to [Transactional](https://app.loops.so/transactional).
Click "New" and create an email similar to this one:
Magic Link Email Transactional
It is important that `url` is a **data variable.**
Now click on "Next", copy the transactional id (a string with this format clq6w35vr000yib0qwz0bwxp7), and paste it in `auth.ts` as the value of `transactionalId`.\
\
You have now configured Loops to send the magic link email 🎉
# AWS SES
Use AWS SES to send magic link emails
First, you’ll need to create your SMTP credentials for AWS Simple Email Service (SES):
* On the old SES console, there’s an **SMTP Settings** link on the left side.
* On the new SES console, the link is under **Account dashboard** on the left sidebar.
Create new SMTP credentials, and copy them. The final string will look like this:
```
smtp://username:password@email-smtp.us-east-1.amazonaws.com:587
```
There are three variables that you should replace in this string:
* `username` and `password`, which are the SMTP credentials you created earlier.
* `us-east-1` replace it with the region that you’re sending emails from
Set this value into the .env file
```yaml
AWS_SES_SMTP="smtp://username:password@email-smtp.us-east-1.amazonaws.com:587"
```
Open `src/config/auth.ts` and set:
```typescript
EmailProvider({
server: process.env.AWS_SES_SMTP || ""
from: process.env.EMAIL_FROM || "",
// maxAge: 24 * 60 * 60, // How long email links are valid for (default 24h)
}),
```
# SendGrid
Use SendGrid to send magic link emails
Generate and API Key on SendGrid and copy it down.
Set it into the **.env** file
```
SENDGRID_API_KEY=""
```
Open `src/config/auth.ts` and add the provider
```typescript
providers: [
EmailProvider({
async sendVerificationRequest({identifier: email, url}) {
// Call the cloud Email provider API for sending emails
// See https://docs.sendgrid.com/api-reference/mail-send/mail-send
const response = await fetch("https://api.sendgrid.com/v3/mail/send", {
// The body format will vary depending on provider, please see their documentation
// for further details.
body: JSON.stringify({
personalizations: [{ to: [{ email }] }],
from: { email: "noreply@company.com" },
subject: "Sign in to Your page",
content: [
{
type: "text/plain",
value: `Please click here to authenticate - ${url}`,
},
],
}),
headers: {
// Authentication will also vary from provider to provider, please see their docs.
Authorization: `Bearer ${process.env.SENDGRID_API_KEY}`,
"Content-Type": "application/json",
},
method: "POST",
})
if (!response.ok) {
const { errors } = await response.json()
throw new Error(JSON.stringify(errors))
}
},
})
],
```
# Supabase Auth
Supabase is a popular service that allows to easily implement authentication.
{% hint style="info" %}
Remember to switch to the branch `supabase` in the Shipped repository to leverage the Supabase code.
{% endhint %}
## Sending emails for Supabase Authentication
Supabase has recently changed their policies in terms of email sending, and in order to provent spam, they allow to send emails only to the member of the Supabase Organization Team ([check yours here](https://supabase.com/dashboard/org/_/team)) and it is intended to be used for testing purposes only.
For production use, it requires you to configure a [custom SMTP](https://supabase.com/docs/guides/auth/auth-smtp).
There are several services you can use to send emails.
A non-exhaustive list of services that work with Supabase Auth is:
* [Resend](https://resend.com/docs/send-with-supabase-smtp)
* [AWS SES](https://docs.aws.amazon.com/ses/latest/dg/send-email-smtp.html)
* [Postmark](https://postmarkapp.com/developer/user-guide/send-email-with-smtp)
* [Twilio SendGrid](https://www.twilio.com/docs/sendgrid/for-developers/sending-email/getting-started-smtp)
* [ZeptoMail](https://www.zoho.com/zeptomail/help/smtp-home.html)
* [Brevo](https://help.brevo.com/hc/en-us/articles/7924908994450-Send-transactional-emails-using-Brevo-SMTP)
**Resend** has a generous [free plan](https://resend.com/pricing), and a [detailed guide about how to integrate Supabase and Resend](https://resend.com/blog/how-to-configure-supabase-to-send-emails-from-your-domain) so I recommend you to get started with it.
We have dedicated guides about the setup of Supabase Auth:
* [Supabase Magic Link](/features/authentication/supabase-auth/supabase-magic-link)
* [Supabase Email & Password](/features/authentication/supabase-auth/supabase-email-and-password)
* [Supabase Authentication Flow](/features/authentication/supabase-auth/supabase-authentication-flow)
# Supabase Authentication Flow
When a user authenticates on Shipped using Supabase Auth Magic link or Email & Password, it follows this flow.
1. The user provides the email (i.e ) and hits the Sign Up button
2. Supabase sends an email to
3. The user clicks on the link included in the email
4. The browser opens the route `yourwebsite.com/supabase/auth/callback` with the code query parameter (`?code=abc...`)
5. The route exchanges the code for a session and saves the user into the database table `public.User` with the same ID as the Supabase Auth user.
## Use the Supabase Auth user with Prisma
Supabase saves all authenticated users into the table `auth.users` (where `auth` is the schema, and `users` the table name) of the Postgres database.
Shipped is configured to use Prisma as the ORM (Object Relational Mapping), and it uses the schema `public` to create all the tables that are needed by your product.
By default, the `prisma.schema` file that comes with Shipped, includes a `public.User` table, with this schema:
```prisma
model User {
id String @id @default(cuid())
name String?
email String? @unique
emailVerified DateTime?
image String?
accounts Account[]
sessions Session[]
UserPlan UserPlan?
}
```
This schema is coming from NextAuth, but you can also use it if you use Supabase Auth.
If you need to add new tables to your database, which refer to a user, use can use a schema similar to the one described below.
For instance, if your product generates screenshots of websites, you'll probably have a `public.Screenshot` table, defined in the `prisma.schema` file as follows:
```prisma
model Screenshot {
userId String
websiteUrl String
screenshotUrl String
createdAt DateTime @default(now())
updatedAt DateTime @updatedAt
user User @relation(fields: [userId], references: [id])
}
```
Notice the foreign key relation between the table `Screenshot` and the table `User`, based on `userId` (`User.id` -> `Screenshot.userId`).
If you need to retrieve the screenshots of the user, use this sample code:
```typescript
import { getSupabaseServerClient } from "@/libs/supabase.server";
import { prismaClient } from "@/prisma/db";
export async function GET() {
const supabase = getSupabaseServerClient();
const supabaseSession = await supabase.auth.getSession();
const session = supabaseSession?.data.session;
/* return error if session is not defined, removed for brevity */
const screenshots = await prismaClient.screenshot.findMany({
where: {
userId: session.user.id
}
})
}
```
This way, you'll be able to combine Supabase Auth, with the Prisma-handled tables and link the users using the Supabase Auth user id.
# Supabase Magic Link
Authenticate users with a password-less method
Shipped comes with support for Supabase Magic Link.
The Magic Link Authentication is a password-less authentication method, that involves sending an email to the user, with a link. When the user clicks on that link, they are redirected to the website, and an active authentication session is created under the hood.
It is very popular and it is used in favor of email & password authentication because it saves you from storing sensitive data.
{% hint style="info" %}
If you need Supabase Auth, move to the `supabase` branch of the Shipped git repository.
All the code changes described below are already applied there.
Use this command in the terminal to move to the branch:
`git checkout supabase`
{% endhint %}
### SignUp / Login
Use this code in `SignUp.tsx` and `Login.tsx`
```tsx
import toast from "react-hot-toast";
import { useSupabaseAuth } from "@/hooks/supabase/useSupabaseAuth";
/* ... */
const { onSignWithMagicLink } = useSupabaseAuth({
onMagicLinkSignInSuccess: (data) => {
toast.success(`Check your inbox for the magic link`);
},
onMagicLinkSignInError: (error) => {
toast.error(error?.message || "An error occurred");
},
});
const onEmailSignIn = async () => {
setSigningInWithEmail(true);
await onSignWithMagicLink(email, signInCallbackUrl);
setSigningInWithEmail(false);
};
```
### Dashboard
Replace `useSession` with `useSupabaseSession` in the dashboard route `src/app/dashboard/page.tsx`
```typescript
import { useSupabaseSession } from "@/hooks/supabase/useSupabaseSession";
/* ... */
const { session, status } = useSupabaseSession();
```
## Hook `useSupabaseAuth`
The new react hook `useSupabaseAuth` is needed to start the Magic Link Authentication flow.\
It returns an object with:
```typescript
onSignWithMagicLink: (email: string) => Promise
onSignOut: () => Promise
```
The hook also supports two optional arguments, to set the callback to manage the success and error events.
```typescript
onMagicLinkSignInSuccess?: (data: any) => void;
onMagicLinkSignInError?: (error: any) => void;
```
The redirect link, after authentication, is defined in the config file in the variables `signInCallbackUrl` which is used in the supabase auth callback route `src/app/supabase/auth/callback/route.ts`.
## Hook `useSupabaseSession`
The second hook included with Shipped is `useSupabaseSession` which is useful to get the current session on the client side and to know if the user is currently logged in or not.\
Its interface is compatible with the `useSession` hook of `next-auth`.
```typescript
const {
status, // "loading" | "authenticated" | "unauthenticated"
session // Session | null
} = useSupabaseSession()
```
## Usage
### Check the session
To know if the user is currently signed in (has an active session) use the hook `useSupabaseSession` this way:
```typescript
const { session, status } = useSupabaseSession();
```
`status` can have three possible values:
* loading
* authenticated
* unauthenticated
If the user is authenticated the `session` object contains a `user` property with the email (`session.user.email`).
### User Management
By default, a new user is created if not already present. Once the user is created, you can manage it from the Supabase Authentication dashboard.
Suapabase Auth
# Supabase Email & Password
Shipped supports Supabase Email and Password authentication.
It is an authentication method that requires the user to provide a valid email and create a password (at least 6 characters in length).
When the credentials are provided, Supabase sends a confirmation email to the inbox of the user.
The email contains a link. When the user clicks on that link, the account is correctly confirmed, and the user can use the credentials to log in to your website.
{% hint style="info" %}
If you need Supabase Auth, move to the `supabase` branch of the Shipped git repository.
All the code changes described below are already applied there.
Use this command in the terminal to move to the branch:
`git checkout supabase`
{% endhint %}
## Add Email and Password auth
To use Email and Password authentication using Supabase, you need to apply a couple of changes.
1. Update the file `src/app/signup/page.tsx`
Replace:
```jsx
import SignUp from "@/components/pages/SignUp/SignUp";
return ;
```
with:
```jsx
import SignUpWithEmailPassword from "@/components/pages/SignUp/SignUpWithEmailPassword";
return ;
```
2. Update the file `src/app/login/page.tsx`
Replace:
```jsx
import Login from "@/components/pages/Login/Login";
return ;
```
with:
```jsx
import LoginWithEmailPassword from "@/components/pages/Login/LoginWithEmailPassword";
return ;
```
\
The configuration is complete.\
You now have both the signup and login pages with email and password prompts, plus the Google sign-in by default.
## Authenticated users
To identify logged-in users in a client component (`"use client"` on top of the component file), use this code:
{% code title="client component" %}
```jsx
"use client"
import { useSupabaseSession } from "@/hooks/supabase/useSupabaseSession";
const ClientComponentExample = () => {
const { session, status } = useSupabaseSession();
}
```
{% endcode %}
# Supabase Login with Google
Sigin in with Google is one of the most popular services, that allows your users to join your SaaS with a couple of clicks.
It doesn't require the users to create and remember a new password, and provides security authentication mechanisms like multi factor authentication, out of the box.
It is common for people to use Login with Google on other wessites, and if they find it on your SaaS website, they will appreciated it.
Therefore, it represents a great way to reduce the frictions, and increase the conversion from visitors to registered users.
Shipped sign up page with Login with the Google integration.
Supabase supports Login with Google, I recommend to follow the [official documentation](https://supabase.com/docs/guides/auth/social-login/auth-google#application-code-configuration) that's kept up to date by the Supabase team.\
\
In our case, you need to follow the **Prerequisites** and the **Application code** instructions.
# API endpoints
**Shipped** uses Next.js 14 latest features, which include the new App Router.
The API endpoints of your product live in the `/app/api/` folder. Any `route.ts` file, and each folder and subfolder, take part to the final endpoint URL.
For example:
/app/api/user/routes.ts ->
/app/api/user/profile/routes.ts ->
/app/api/user/\[id]/profile ->
The logic of each route resides in the `route.ts` files.
### Make an API call from your website
To make API calls, use the library `axios`.
```typescript
import axios from "axios";
import toast from "react-hot-toast";
axios
.post("/api/waitlist", {
email,
})
.then(() => {
toast.success("You've been added to the waitlist!");
})
.catch(() => {
toast.error("Something went wrong. Please try again later.");
})
.finally(() => {
setLoading(false);
});
```
# Authenticated API
Protect API routes from unauthenticated access
While building the backend (routes) of your application, you will probably have a protected section.
That means that only authenticated users can access those pages and API endpoints.
For instance, you could protect the `/api/user` route to return the current authenticated user details, only if the user is authenticated.
The authentication check is different in case you use NextAuth or Supabase Auth.
## NextAuth
To verify if a user is authenticated in an API route, using NextAuth, use the following code:
```tsx
import { getServerSession } from "next-auth/next";
/* ... */
export async function GET() {
// retrieve the current session
const session = await getServerSession(authOptions);
// check if the session exists and user email is set
if (!session || !session?.user?.email) {
return NextResponse.json(
{ error: "Unauthorized" },
{ status: HttpStatusCode.Unauthorized }
);
}
}
```
## Supabase Auth
To verify if a user is authenticated in an API route, using NextAuth, use the following code:
```typescript
import { getSupabaseServerClient } from "@/libs/supabase";
/* ... */
export async function GET() {
// retrieve the current session
const supabase = getSupabaseServerClient();
const supabaseSession = await supabase.auth.getSession();
const session = supabaseSession?.data.session;
// check if the session exists and user email is set
if (!session || !session?.user?.email) {
return NextResponse.json(
{ error: "Unauthorized" },
{ status: HttpStatusCode.Unauthorized }
);
}
}
```
# Blog
How to write articles and boost your SEO.
Writing blog posts is the main activity to start working on the SEO of your product, and write valuable content for your users or people potentially interested in your product.
Shipped provides support for MDX-based blogging.
{% hint style="info" %}
MDX is the Markdown for JSX syntax, you can learn more about it here
{% endhint %}
To create a new blog post follow these steps:
1. Create a new .mdx file in the folder `blogposts`
2. Include the following metadata at the top of the file
```mdx
---
title: "Blogpost title"
description: "Blogpost description"
date: "15 Jan, 2024"
slug: "blogpost-slug"
ogImage:
url: "https://....jpg"
---
```
After the metadata, you can add the blog post content in Markdown format.
In this example, the blogpost will be available at `http://localhost:3000/blog/blogpost-slug`
### Images
You can use both absolute and relative paths for images.
Examples:
Absolute path: `https://yourhosting/image.jpg`
Relative path: `../blogpostsimages/image.jpg`
To use relative paths, you need to add the image to your codebase.
For instance, to use this relative path `../blogpostsimages/image.jpg` you need to place the file `image.jpg` into the folder `/blogpostsimages` of your project.
{% hint style="warning" %}
**Important**
The markdown file and the slug metadata, need to have the same value to properly work.
{% endhint %}
### Embeds
Shipped currently supports the following embeds: Loom, YouTube, and Tweet.
```typescript
```
### Image hosting
To start, I recommend placing the images inside your project.
If you are using Vercel to host your website (the easiest solution to get started), those images will consume some bandwidth, but if you don't have high traffic, you will certainly remain within the limits (100GB for free, 1TB on the $20/month plan).
If you prefer to use a CDN instead, you can use your favorite CDN solution (I use AWS S3 with Cloudfront for instance), but other alternatives are Cloudinary, and CloudFlare.
### Advanced
Shipped uses the library [next-mdx-remote](https://github.com/hashicorp/next-mdx-remote) under the hood to parse the MDX files.\
For advanced customizations, please refer to the documentation of the library.
# Customer support
## Userdesk
Userdesk is an AI Chatbots platform. It allows you to train a chatbot (similar to ChatGPT) that replies to the visitors and users of your product in a live chat, embedded on your website.
1. Sign up to [Userdesk](https://userdesk.io/)
2. Add your website URL
3. Connect a brand new Notion page or Google Doc, that you'll structure as an FAQ document
4. Set `NEXT_PUBLIC_USERDESK_CHATBOT_ID` into `.env` with the chatbot id
The chatbot will be automatically included on the website.
## Crisp
Crips is a customer support solution. To add a widget to your page, create an account at Crisp, then paste the Crisp Website ID value into `.env` for the variable `NEXT_PUBLIC_CRISP_WEBSITE_ID`
The live chat widget will be automatically included in your website.
# Chrome Extension
Boilerplate for the React Chrome Extension
{% hint style="info" %}
This boilerplate is available with the package [Startup **+ Chrome Extension Boilerplate**](https://shipped.club/chrome-extension-boilerplate) so be sure to purchase it to get access.
{% endhint %}
## Get started
Start by cloning the repository.
```bash
git clone git@github.com:ShippedForBrowserExtensions/shipped-browser-extensions.git
cd shipped-browser-extensions
```
This repository contains both the Startup package, and the Next.js web app with all the components, pages, integrations, and the extension.
All the code for the extension is in the `/extension` folder of the repository.
Move to the extension folder, install the dependencies, and run it.
```bash
cd extension
nvm use # install the right version of node.js
npm i # install dependncies
npm run watch:dist # build and watch
```
When built, the Chrome Extension files are available into the folder `/extension/dist`.
## Configuration
To configure the Chrome Extension you need to:
* set the dev domain in `extension/src/config.ts` (use the ngrok URL domain, see [below](#test-authentication-locally))
* set the production domain in `extension/src/config.ts` (this is the URL of your production website, i.e. yourwebsite.com)
* fill the other variables in `extension/src/config.ts`
* update the file `extension/src/manifest.json` with all the information needed, especially:
* `externally_connectable`
* `host_permissions`
## **Load the extension into Chrome**
To load the extension you need to follow these steps:
* Open Chrome
* Click on the three dots menu > Extensions > Manage Extensions
* Enable the **Developer mode**
* Click on **Load unpacked**
* Select the shipped `/extension/dist` folder on your computer
* The extension is now installed, and the welcome page should be open
## **Install welcome page**
The welcome page is available at `src/app/extension/welcome/page.tsx`
To use it, you need to execute `npm run dev` in the root folder of the repository.
The page is available at `http://localhost:3000/extension/welcome`.
## Test authentication locally
To make the authentication work inside the extension, you need to use a publicly available domain.
We will use `ngrok` for this purpose.
{% code title="terminal" %}
```bash
npm install -g ngrok # install ngrok globally
npm run dev # run your local Next.js web server
ngrok http http://localhost:3000 # run ngrok with redirect to your local web server
```
{% endcode %}
Take the URL returned by ngrok and update the file `extension/src/config.ts`.
{% code title="extension/src/config.ts" %}
```tsx
export const domainDev = "a3f9-2001-b07-645f-cf50-d107-284b-a956-944f.ngrok-free.app";
```
{% endcode %}
Update the environment variable in .env to your ngrok URL if you're using NextAuth (otherwise, skip it).
{% code title=".env" %}
```properties
NEXTAUTH_URL="https://a3f9-2001-b07-645f-cf50-d107-284b-a956-944f.ngrok-free.app"
```
{% endcode %}
Now, if you have the watcher active (`npm run watch:dist`) the chrome extension should be automatically built, otherwise, execute `npm run dist` in the `extension` folder.
Uninstall your Chrome extension from and `Load unpacked` again.
The welcome page should open! (bear in mind that using `ngrok` adds a small delay in the way the local Next.js web server is served).
Chrome Extension install welcome page
{% hint style="info" %}
**Claim your free static ngrok domain**
Do avoid having a different ngrok domain every time your run ngrok, follow [this guide](https://ngrok.com/blog-post/free-static-domains-ngrok-users) to get a static fixed domain.
{% endhint %}
## Storybook
Storybook is an excellent tool to build React component in isolation.
Considering that the build and reload of a Chrome extension takes time (build time + go to the extension tab and click reload), I thought of using Storybook when you just need to develop the UI components of your extension (much faster).
Execute storybook
{% code title="terminal" %}
```bash
cd extension
npm run storybook
```
{% endcode %}
This command will run Storybook and open
Storybook
The project includes the UI Library ChakraUI, so you can see the Stories for its components.
But the first stories on the left are yours. Feel free to customize and update the React components, and you'll see them updated in Storybook in a matter of seconds!
The Storybook stories files include the suffix `.stories.tsx` in the filename (i.e. `Brand.stories.tsx`) and I like to put them close to the component file.
## Production Release
Set `domainProd` in `extension/src/config.ts` with the domain of your website.\
Build the extension with npm run dist\
Go to the [Chrome Web Store](https://chromewebstore.google.com/) and create your extension, then upload the zip generated in `extension/zip` to release a new version.
You can test your production extension locally with these steps: [#load-the-extension-into-chrome](#load-the-extension-into-chrome "mention")
# Dark mode
It's important to respect the preferences of the users, in terms of color mode (light and dark).
Shipped comes with full support for both modes and provides a `` component to control it.
{% embed url="" %}
# Database
**Shipped** comes with a database ORM that makes it extremely easy to configure a database and interact with it (query, insert, update, delete) — [Prisma](https://www.prisma.io/).
Prisma supports multiple databases, PostgreSQL, MySQL, MariaDB, MongoDB, and others ([full list here](https://www.prisma.io/docs/reference/database-reference/supported-databases)).
I always go with Postgres, because it's one of the best SQL databases in the market, open source, very popular, and very stable.
You can create a Postgres database for free using [Supabase](https://supabase.com/).
But these are other popular services to create a SQL database (Postgres or MySQL):
* [Digital Ocean](https://www.digitalocean.com/)
* [PlanetScale](https://planetscale.com/)
* [Railway](https://railway.app/)
* [AWS RDS](https://aws.amazon.com/rds/)
I usually go with DigitalOcean, because of its ease of use.
If you prefer a NoSQL database instead, go with MongoDB.\
You can create a managed MongoDB instance in the cloud using [MongoDB Atlas](https://www.mongodb.com/atlas/database).
## :gear: Setup
Create the database using your favorite service, and get the connection string.
For Postgres, it is a string with this format
```properties
postgresql://johndoe:randompassword@host:5432/mydb?schema=public
```
{% hint style="info" %}
If you use the Supabase Postgres, take the database connection string string way.
* Go to Supabase and select your project.
* Go to Home.
* Click on the button "Connect".
* Click on the tab "ORMs"
* Paste DATABASE\_URL and DIRECT\_URL to your `.env`
* Paste the `schema.prisma` values into your local file
{% endhint %}
### 1. Set the connection string
Paste it into the `.env` file as the value for the variable `DATABASE_URL`
The database schema (tables and columns) is defined in the file `prisma/schema.prisma` and Shipped already provides the base tables to handle authentication there.
### 2. Set the provider
Open `prisma/schema.prisma` and set `provider = "postgresql"` .
Here's the list of provider values:
| Database | Provider value |
| -------------------- | -------------- |
| PostgreSQL | postgresql |
| MySQL | mysql |
| MariaDB | mysql |
| SQLite | sqlite |
| Microsoft SQL Server | sqlserver |
| MongoDB | mongodb |
| CockroachDB | cockroachdb |
### 3. Initiate the database
To initiate your database, open a terminal, go to the Shipped folder, and run
{% code title="terminal" %}
```bash
npm i # install all dependencies
npx prisma generate # initiate prisma
npx prisma db push # push the schema to the database
```
{% endcode %}
Now the database is ready to be used.
If you see this message, you are ready!
## Database operations
To execute query, insert, update, delete on the database, follow this pattern.
{% code title="example.ts" %}
```typescript
import { prismaClient } from "@/prisma/db";
const user = await prismaClient.user.findUnique({
where: {
email: "john@doe.com",
},
});
```
{% endcode %}
# Update your database
To add new tables or columns to your database we use Prisma.\
\
Prisma is a TypeScript ORM, and it helps you apply changes to your database, and interact with it in a type-safe way., and without using SQL.
## Add a new table
To add a new table, open the file `prisma/schema.prisma` and add a new model.
For instance, to add a new table called `Orders`, add this
model Order {
  id                  Int       @id @default(autoincrement())
  email               String
  orderId             String
  createdAt           DateTime  @default(now())
  updatedAt           DateTime  @updatedAt
}
## Add column
To add a column to a table, simply add a new property to a model.
To add a new column, called `validUntil` to the previous `Orders` table, simply add line 5:
model Order {
  id                  Int       @id @default(autoincrement())
  email               String
  orderId             String
  validUntil          DateTime?
  createdAt           DateTime  @default(now())
  updatedAt           DateTime  @updatedAt
}
{% hint style="info" %}
It's a good idea to add a new column to existing tables, with a nullable value.\
You do it by appending a question mark (`?)`at the end of the column type.
It means that, as soon as the new column is created, it's value will be `NULL`.
Alternatively, assign a default value, using the `@default()` decorator.
{% endhint %}
## Apply the schema to your database
To do that, run this command:
{% code title="Terminal" %}
```bash
npx prisma db push
```
{% endcode %}
With this command, prisma will apply the schema defined into `prisma/schema.prisma` to the database defined in the .env file, using the connection string defined in the environment variable `DATABASE_URL`.
For more details about Prisma, check the [official documentation of Prisma.](https://www.prisma.io/docs/orm)
# MongoDB
Use a NoSQL database
With the Prisma ORM you can use MongoDB as your main database.
However, there are small differences in the way the schema needs to be defined.
## MongoDB Prisma Schema
Shipped provides you with a `prisma.schema` file suitable for MongoDB.
Simply replace the `prisma.schema` with `prisma.mongodb.schema`
{% code title="terminal" %}
```bash
cd prisma
mv schema.prisma schema.sql.prisma
cp schema.mongodb.prisma schema.prisma
```
{% endcode %}
{% hint style="info" %}
To learn more about the Prisma usage with MongoDB check the [official documentation](https://www.prisma.io/docs/orm/overview/databases/mongodb#differences-to-consider).
{% endhint %}
# Emails
Collect emails, send transactional emails, product updates, and email drip.
I've built 5 SaaS in the last 2 years, and I know how email is crucial to engage with your customers, still in 2024.
**Shipped** comes with support for two popular products, [MailChimp](https://mailchimp.com/) and [Loops](https://loops.so/).
Both allow you to:
* Collect user emails
* Send product update emails to the subscribers
* Configure an email drip
* Send transactional emails from your product
## MailChimp setup
Configure these environment variables `MAILCHIMP_AUDIENCE_LIST_ID`, `MAILCHIMP_API_KEY`, and `MAILCHIMP_SERVER_PREFIX`.
### Find your Audience ID
You need it to add the users to your email list.
Log in to your [MailChimp](https://mailchimp.com/) account and then:
1. Click **Audience**
2. Click **All contacts**
3. If you have more than one audience, click the **Current audience** drop-down and choose the one you want to work with.
4. Click the **Settings** drop-down and choose **Audience name and defaults**.
5. In the **Audience ID** section, you’ll see a string of letters and numbers. This is your audience ID.
Save the value into `MAILCHIMP_AUDIENCE_LIST_ID` in the .env file
### Create your API Key
Needed to send transactional emails.
1. Navigate to the [**API Keys**](https://us1.admin.mailchimp.com/account/api/) section of your account.
2. Click **Create New Key**.
3. Name your key. Be descriptive, so you know what app uses that key. Keep in mind that you’ll see only this name and the first 4 key digits on your list of API keys.
4. Click **Generate Key**.
5. Once we generate your key, click **Copy Key to Clipboard**. Save your key someplace secure–you won’t be able to see or copy it again. If you lose this key, you’ll need to generate a new key and update any integration that uses it.
6. Click **Done**.
Save the value into `MAILCHIMP_API_KEY` in the .env file
### Configure server prefix
To find the value for the `server` log into your Mailchimp account and look at the URL in your browser. You’ll see something like `https://us19.admin.mailchimp.com/` \
The `us19` part is the server prefix. Note that your specific value may be different.
Save the value into `MAILCHIMP_SERVER_PREFIX` in the .env file
### Add a new email contact at sign-up
Open the file `src/config/auth.ts` and uncomment `addMailChimpListMember` in the `signIn` event handler
{% code title="src/config/auth.ts" %}
```typescript
events: {
async signIn(event) {
if (event.isNewUser && event.user.email)
await addMailChimpListMember({
email: event.user.email,
firstName: event.user.name || "",
lastName: "",
tags: ["new-user"],
});
}
},
},
```
{% endcode %}
{% hint style="info" %}
Learn more about the MailChimp Marketing API on the [documentation](https://mailchimp.com/developer/marketing/api/)
{% endhint %}
### Send transactional email
```typescript
import { sendTransactionalEmail } from "@/libs/mailchimp";
await sendTransactionalEmail({
to: ["john@doe.com", "jane@doe.com"],
subject: "You reached the limits",
text: "Upgrade to get more requests",
html: "
Upgrade to get more
"
})
```
### Send transactional email with template
Define and store your template in MailChimp.
```typescript
import { sendTransactionalEmailWithTemplate } from "@/libs/mailchimp";
await sendTransactionalEmailWithTemplate({
to: ["john@doe.com", "jane@doe.com"],
subjplateName: "my template",
mergeTags: [{
name: "merge1",
content: "merge1 content",
}]
})
```
{% hint style="info" %}
Learn more about the MailChimp Transactional API on the [documentation](https://mailchimp.com/developer/transactional/api/)
{% endhint %}
## Loops setup
To set up Loops you need to create an API Key.
{% embed url="" %}
How to use Loops for Magic Link with NextAuth
{% endembed %}
### Create API Key
1. Log in to [Loops](https://loops.so/)
2. Go to **Settings**
3. Click on **API**
4. Click on **Generate key**
5. Copy the key and paste it to `.env` as the value for `LOOPS_API_KEY`
### Add a new contact at sign-up
Open the file `src/config/auth.ts` and uncomment `createLoopsContact` in the `signIn` event handler
{% code title="src/config/auth.ts" %}
```typescript
events: {
async signIn(event) {
if (event.isNewUser && event.user.email) {
await createLoopsContact({
email: event.user.email,
firstName: event.user.name || "",
lastName: "",
userGroup: "new-user",
});
}
},
},
```
{% endcode %}
### Send a transactional email
Go to Loops and create a new Transactional. Copy the transactional id.
```typescript
import { sendTransactionalEmail } from "@/libs/loops";
await sendTransactionalEmail({
"clfq6dinn000yl70fgwwyp82l", // <-- transactional id
"john@doe.com", // <-- to email
{
loginUrl: "https://myapp.com/login/" // <-- dynamic content
}
})
```
{% hint style="info" %}
Learn more about the Loops API in the [documentatio](https://loops.so/docs/sdks/javascript)[n](https://loops.so/docs/sdks/javascript)
{% endhint %}
# Error pages
## Errors handling
When an error occurs on a page, the error is intercepted by an error route.
The page is defined by `src/app/error.tsx` and it renders the component ``
PageError component
You can define specific error pages by adding an `error.tsx` file to a nested route, for instance inside the folder `src/app/dashboard/`
## Not Found
If a page route doesn't exist, the Not Found page is rendered.
Customize it by editing the file `src/app/not-found.tsx`
{% hint style="info" %}
Learn more about [Next.js Error Handling](https://nextjs.org/docs/app/building-your-application/routing/error-handling)
{% endhint %}
# Icons
Shipped comes with the react-icons package installed.
It is the most complete icons package, with many sets already present.
You can find the whole set here:
Using the icons is straight forward.
For instance, for the icon set Tabler Icons (one of my favourites) you can import and icon like this:
```jsx
import { TbSquareRoundedX } from "@react-icons/tb"
```
It will render:
The icons are SVG, so you can style them with normal CSS rules.
I style them this way using ChakraUI:
```jsx
```
# Onboarding
Collect information about your users
Shipped provides a basic onboarding to collect information about the users that signup into your product for the first time.
Example of onboarding
When the button Next is clicked, the answers are saved to the database, and the onboarding is marked as complete for the currently authenticated user.
The page also checks if:
* the user is logged in, otherwise redirects the page to `/login`
* the onboarding is complete, in positive case, it redirects to `/dashboard`
You reach the onboarding page by browsing `/onboarding`.
## Redirect to onboarding after sign-up
Update the file `src/config/config.ts`
```typescript
// the users will be redirected to this page after sign in
export const signInCallbackUrl = "/onboarding";
```
## Customize the questions
You can customize the questions by updating the file `src/components/UserOnboarding/onboarding.questions.ts`
You can define free text and questions with predefined answers.
```typescript
export const questions: Question[] = [
{
question: "What's your name?",
type: "text",
name: "name",
},
{
question: "What's your role?",
type: "select",
name: "role",
options: ["Founder", "Product Manager", "Engineer", "Designer"],
},
{
question: `Where did you find ${brandName}?`,
type: "select",
name: "source",
options: [
"Twitter / X",
"Facebook",
"LinkedIn",
"Instagram",
"Google",
"Newsletter",
"Other",
],
},
];
```
A database table named `UserOnboarding` is required (already included `prisma.schema`)
```prisma
model UserOnboarding {
id String @id @default(cuid())
userId String
isComplete Boolean @default(false)
role String?
source String?
createdAt DateTime @default(now())
updatedAt DateTime @updatedAt
user User @relation(fields: [userId], references: [id])
}
```
To customize the questions, you need to:
* update table `UserOnboarding` to include the question key you want to use (by default `role` and `source`)
* run `npx prisma generate` to update the database types
* update the file `src/components/UserOnboarding/onboarding.questions.ts`
* update `PostOnboardingRequest` in `src/app/api/onboarding/route.ts` with the expected question keys
* update the question keys in `src/app/api/onboarding/route.ts` (validity checks and the prisma record creation `await prismaClient.userOnboarding.create({`)
* finally run `npx prisma db push` to apply the updated table to your database
{% hint style="info" %}
By default, the `name` question value is stored in the table `User` in the column `name` if it's not present.
This is particularly useful if you are using email authentication.
{% endhint %}
## Hook: useOnboarding
```typescript
const { isLoadingOnboarding, isOnboardingCompleted } = useOnboarding();
```
This hook is particularly useful to check if the onboarding, for the current user, is completed or not.
If you have an onboarding, you probably want to redirect the user after the signup, but only if it is not complete.
To do that you can use `isOnboardingCompleted` in the `SignUp` component and update the redirect URL accordingly. Here's an example:
{% code title="SignUp.tsx" %}
```typescript
const { isLoadingOnboarding, isOnboardingCompleted } = useOnboarding();
const redirectRoute = isOnboardingCompleted ? Routes.dashboard : Routes.onboarding
const redirectUrl = window?.location ? `${window.location.origin}${redirectRoute}` : "",
const onGoogleSignUp = () => {
setSigningUpWithGoogle(true);
signIn("google", {
callbackUrl: redirectUrl
});
};
const onEmailSignUp = async () => {
setSigningUpWithEmail(true);
await signIn("email", {
email,
callbackUrl: redirectUrl
});
setSigningUpWithEmail(false);
};
```
{% endcode %}
# Payments
Collect payments using Lemon Squeezy
Shipped supports Lemon Squeezy to collect payments online for your product.
Discover how to use it in the next page.
# Lemon Squeezy
Lemon Squeezy (LS) is a Merchant of Records.
It supports more countries than Stripe, but it has a more strict approval process, because LS sells your products on your behalf worldwide, they collect VAT and remit taxes in the different countries for you.
It also has an affiliate system out-of-the-box.
Shipped supports LS for Subscriptions and One-time purchases.
Shipped supports Lemon Squeezy to collect payment. First of all, you need to create a store. If you haven't, [follow the guide](/tutorials/create-your-store-on-lemon-squeezy).
After that, you need to configure a webhook on Lemon Squeezy, follow these steps:
1. Log into [Lemon Squeezy](https://www.lemonsqueezy.com/)
2. Go to **Settings**
3. Click on **Webhooks**
4. Click on the "**+**" icon
5. Fill in **Callback URL** with
6. Fill in **Signing Secret** with the [Secrets Generator](https://shipped.club/free-tools/secret-password-generator) of Shipped
7. Select the events
1. For subscriptions:
1. `subscription_created`
2. `subscription_updated`
3. `subscription_cancelled`
4. `subscription_resumed`
5. `subscription_expired`
6. `subscription_paused`
7. `subscription_unpaused`
2. For orders (one-time payments):
1. `order_created`
2. `order_refunded`
8. Click **Save Webhook**
9. open `.env` and set `LEMONSQUEEZY_WEBHOOK_SECRET` with the Signing Secret value
Lemon Squeezy Webhook Settings
The webhook provided by **Shipped** is at `src/app/api/webhooks/lemonsqueezy/route.ts` and it will handle all the payments and subscription events for you.
# Subscriptions
Manage the subscriptions of your SaaS customers
When a new subscription is created or updated, a record in the `UserPlan` table is created or updated. That is where the subscription of your users lives.\
Remember that only one subscription can exist for a user and that the user must exist in the User table when the subscription or order is created.
{% hint style="warning" %}
### What if the user was not signed up when they purchased?
In that case, ask for the user to sign up, go to *Lemon Squeezy* > *Settings* > *Webhooks*, search for the `order_created` or `subscription_created` event from that user, and resend the event.
{% endhint %}
## Database
The file `prisma/schema.prisma` already contains tables to manage the subscription plans of your SaaS. Those tables are `SubscriptionPlan`, `PlanProperty`, and `UserPlan`, let's see how they are used.
### Table SubscriptionPlan
This table must contain all the subscription plans you create in Lemon Squeezy.
Its columns are:
{% code title="Table SubscriptionPlan" %}
```prisma
id String @id @default(cuid())
name String
productId String
price String
createdAt DateTime @default(now())
updatedAt DateTime @updatedAt
```
{% endcode %}
You can add new records by running `npx prisma studio` in the terminal, it will run the database client UI at .
{% hint style="info" %}
To generate random cuids, you can use the [CUID Generator](https://shipped.club/free-tools/secret-password-generator?type=randomid\&format=cuid) of Shipped.
{% endhint %}
If you have a free plan, you can create a record for it as well.
### Table PlanProperty
When you have subscription plans in your SaaS, each plan will probably have some limits and properties. This table is intended to save those properties for each Subscription Plan.
Here's an example.
| Plan | Screenshots | planId |
| --------- | ----------- | ------------------------ |
| **Free** | 10/month | thlx5o9ds0m8s8g9p8e7utvo |
| **Hobby** | 500/month | hjtmghruw3tw68x6daxqgwhu |
| **Pro** | 1000/month | rgiy096elb1s4fsauug9qamf |
For each plan you can create a record in the table `PlanProperty`, like this:
| id | planId | propertyName | value |
| --- | ------------------------ | ---------------- | ----- |
| 123 | thlx5o9ds0m8s8g9p8e7utvo | MAX\_SCREENSHOTS | 10 |
| 234 | hjtmghruw3tw68x6daxqgwhu | MAX\_SCREENSHOTS | 500 |
| 345 | rgiy096elb1s4fsauug9qamf | MAX\_SCREENSHOTS | 1000 |
### Table UserPlan
UserPlan is the table in which are stored the subscription plans purchased by your customers.
The records are automatically inserted and updated by the webhook `/api/webhooks/lemonsqueezy` but it might happen that you need to manually update it, for any reason.
This table is intended to contain only one record for each user (no multiple plans are allowed).
{% code title="UserPlan table schema" %}
```prisma
model UserPlan {
id String @id @default(cuid())
userId String @unique
planId String
lemonOrderId String?
lemonProductId String
lemonVariantId String?
lemonPlanName String?
lemonPlanPrice String?
lemonSubscriptionId String?
createdAt DateTime @default(now())
updatedAt DateTime @updatedAt
validUntil DateTime?
cancelUrl String?
updateUrl String?
status String?
user User @relation(fields: [userId], references: [id])
plan SubscriptionPlan @relation(fields: [planId], references: [id])
}
```
{% endcode %}
# One-time purchase
Manage the orders of your product.
When a new purchase occurs, the code stores the event in a table called `Order`.
Here are the steps needed to support it.
### Database
Add this table definition to your `prisma/schema.prisma` file:
{% code title="schema.prisma" %}
```prisma
model Order {
id Int @id @default(autoincrement())
email String
lemonOrderId String?
lemonProductId String
lemonVariantId String?
lemonVariantName String?
lemonPlanName String?
lemonPlanPrice String?
lemonSubscriptionId String?
createdAt DateTime @default(now())
updatedAt DateTime @updatedAt
validUntil DateTime?
cancelUrl String?
updateUrl String?
status String?
}
```
{% endcode %}
Push the new table to your database:
{% code title="terminal" %}
```bash
npx prisma db push
```
{% endcode %}
Then open the file `src/app/api/webhooks/lemonsqueezy/route.ts` and replace its content with this:
{% code title="src/app/api/webhooks/lemonsqueezy/route.ts" %}
```typescript
import { NextResponse } from "next/server";
import rawBody from "raw-body";
import crypto from "crypto";
import { Readable } from "stream";
import { headers } from "next/headers";
import { prismaClient } from "@/prisma/db";
type ISODate = string;
export type WebhookRequest = {
meta: {
event_name:
| "order_created"
| "order_refunded"
| "subscription_created"
| "subscription_updated"
| "subscription_cancelled"
| "subscription_resumed"
| "subscription_expired"
| "subscription_paused"
| "subscription_unpaused"
| "subscription_payment_failed"
| "subscription_payment_success"
| "subscription_payment_recovered"
| "license_key_created"
| "license_key_updated";
};
data: {
type: "subscriptions";
id: string;
attributes: {
store_id: number;
customer_id: number;
order_id: number;
order_item_id: number;
product_id: number;
variant_id: number;
product_name: string;
variant_name: string;
user_name: string;
user_email: string;
status: string;
status_formatted: string;
card_brand: string;
card_last_four: string;
pause: null;
cancelled: boolean;
trial_ends_at: ISODate;
billing_anchor: number;
urls: {
update_payment_method: string;
};
renews_at: "2023-01-24T12:43:48.000000Z";
ends_at: null;
created_at: "2023-01-17T12:43:50.000000Z";
updated_at: "2023-01-17T12:43:51.000000Z";
test_mode: false;
first_order_item: {
id: number;
price: number;
order_id: number;
price_id: number;
test_mode: boolean;
created_at: ISODate;
product_id: number;
updated_at: ISODate;
variant_id: number;
product_name: string;
variant_name: string;
};
};
relationships: {
store: {
links: {
related: string;
self: string;
};
};
customer: {
links: {
related: string;
self: string;
};
};
order: {
links: {
related: string;
self: string;
};
};
"order-item": {
links: {
related: string;
self: string;
};
};
product: {
links: {
related: string;
self: string;
};
};
variant: {
links: {
related: string;
self: string;
};
};
"subscription-invoices": {
links: {
related: string;
self: string;
};
};
};
links: {
self: string;
};
};
};
export async function POST(request: Request) {
const body = await rawBody(Readable.from(Buffer.from(await request.text())));
const headersList = headers();
const payload: WebhookRequest = JSON.parse(body.toString());
console.log(">>> payload", payload);
const sigString = headersList.get("x-signature");
const secret = process.env.LEMONSQUEEZY_WEBHOOK_SECRET as string;
const hmac = crypto.createHmac("sha256", secret);
const digest = Buffer.from(hmac.update(body).digest("hex"), "utf8");
const signature = Buffer.from(
Array.isArray(sigString) ? sigString.join("") : sigString || "",
"utf8"
);
// validate signature
if (!crypto.timingSafeEqual(digest, signature)) {
return NextResponse.json({ message: "Invalid signature" }, { status: 403 });
}
const userEmail = payload.data.attributes.user_email;
const eventName = payload.meta.event_name;
const userOrder = await prismaClient.order.findFirst({
where: {
email: userEmail,
status: "CREATED",
},
});
if (eventName === "order_created") {
await prismaClient.order.create({
data: {
email: userEmail,
lemonOrderId:
payload.data.attributes.first_order_item.order_id.toString(),
lemonProductId:
payload.data.attributes.first_order_item.product_id.toString(),
lemonVariantId:
payload.data.attributes.first_order_item.variant_id.toString(),
lemonVariantName: payload.data.attributes.first_order_item.variant_name,
lemonPlanName: payload.data.attributes.first_order_item.product_name,
lemonPlanPrice: null,
lemonSubscriptionId: null,
validUntil: new Date(),
updateUrl: null,
status: "CREATED",
},
});
}
if (eventName === "order_refunded") {
if (userOrder) {
await prismaClient.order.update({
where: {
id: userOrder.id,
},
data: {
status: "REFUNDED",
},
});
}
}
return NextResponse.json({ result: true }, { status: 200 });
}
```
{% endcode %}
### Lemon Squeezy
Enable the order\_created order\_refunded events on Lemon Squeezy, in the Webhook configuration.
**Settings > Webhooks > Edit the WebHook**
Now, whenever a customer buys your product, a new record will be created in the table `public.Order`
# Test mode
While working on your product, you will develop on `localhost`.
To test your payment workflow, Lemon Squeezy supports Test mode.
To turn Test mode on, go to Lemon Squeezy and click the toggle at the bottom of the page.
Lemon Squeezy Test mode
Now it's time to configure the webhook for the Test mode.
With Test mode on, go to *Settings* > *Webhooks* and click on the plus icon to add a new Webhook.
Your development website runs on `localhost:3000`, so Lemon Squeezy cannot reach it from the web.\
\
To solve this problem you can use a tool called `ngrok`.\
`ngrok` generates a publicly available web URL that redirects to your `localhost`.
### Install ngrok
Follow the instructions to [install ngrok](https://ngrok.com/docs/getting-started/#step-1-install) for your operating system on the official website.
Once installed, run your Next.js app with `npm run dev`. The app will run at `http://localhost:3000`.
Run `ngrok` with the command:
{% code title="terminal" %}
```bash
ngrok http http://localhost:3000
```
{% endcode %}
You will see something similar to the following console UI in your terminal.
```bash
ngrok (Ctrl+C to quit)
Session Status online
Account inconshreveable (Plan: Free)
Version 3.0.0
Region United States (us)
Latency 78ms
Web Interface http://127.0.0.1:4040
Forwarding https://84c5df474.ngrok-free.dev -> http://localhost:3000
Connections ttl opn rt1 rt5 p50 p90
0 0 0.00 0.00 0.00 0.00
```
According to this example, the Lemon Squeezy Webhook URL will be (the initial part of the URL will change in your case):
```
https://84c5df474.ngrok-free.dev/api/webhooks/lemonsqueezy
```
Now go to Lemon Squeezy, *Settings* > *Webhooks*, click on the plus icon to add a new Webhook and insert the URL.
You can now open the Lemon Squeezy Test Checkout of your products and test the complete purchasing flow.
### Test card numbers
Use the following credit card numbers to test the different payment methods.
* Visa: `4242 4242 4242 4242`
* Mastercard: `5555 5555 5555 4444`
* American Express: `3782 822463 10005`
* Insufficient funds: `4000 0000 0000 9995`
* Expired card: `4000 0000 0000 0069`
* 3D Secure: `4000 0027 6000 3184`
{% hint style="info" %}
The Test mode of Lemon Squeezy is like a brand new store. It means that you need to create the Test products, and use their checkout URLs.
{% endhint %}
### Test and Production Checkout URLs
Use Environment Variables to store the products checkout URLs.\
This way you can use the Lemon Squeezy Test mode checkout URLs locally (`.env` file) and the production Lemon Squeezy checkout URLs in production (set them in the Environment Variables on Vercel, Netlify, or any other hosting service you're using).
The file `src/config/pricing.constants` contains the different plans of your product.
```typescript
export const pricingPlans = [
{
title: "Hobby",
monthlyPrice: 19,
annualPrice: 199,
monthlyCheckoutUrl: process.env.HOBBY_CHECKOUT_URL_MONHTLY,
annualCheckoutUrl: process.env.HOBBY_CHECKOUT_URL_ANNUAL,
features: ["Team", "Workspace", "Integrations"],
}
];
```
{% hint style="info" %}
If you are launching a pre-order page instead, update the file `src/config/lifetime.constants.ts`
{% endhint %}
# Stripe
Shipped supports Lemon Squeezy by default, but you can activate Stripe in few simple steps.
### Requirements
To setup Stripe you need:
* A [Stripe](https://stripe.com/) account
* A [database](/features/database) configured
### Create the subscription plans
Access to the [Stripe Dashboard](https://dashboard.stripe.com/), go to "Product catalogue" and create a new product.\
Define the name, description, pricing (and more) of your plan.\
Once created, go to Products > Payments > Payment Links and copy the URL of the product.
Open the file `src/config/pricing.constants.ts` and paste the payment link URL in the right plan.
{% hint style="info" %}
For Lifetime deals, update the file `src/config/lifetime.constants.ts` instead.
{% endhint %}
This step ensure that when the users interact with the <[`Pricing`](/components/pricing)`/>` component, when they click on the "Subscribe" button, the checkout of the correct product will open in the browser.
### Update the database
You need to pre-populate the table `SubscriptionPlan` of the database with your products.
First of all, get the product IDs. To do so, go to the [Stripe Dashboard](https://dashboard.stripe.com/) go to "Product catalogue", click on a product and copy the "Product ID".
Then open your database (run the command `npx prisma studio` in your terminal to open a database client).\
Open the table `SubscriptionPlan`.\
Add a new record, and populate "name", "productId", and "price" (the other columns will be pre-populated).\
Click on "Save change".
### Create a Webhook
You need to configure a Webhook in Stripe. A webhook is a backend endpoint (a route in Next.js) that will be called when a new event occurs (like a new purchase, or a subscription deletion).\
Shipped provides the code to handle these requests.
Go to the Stripe Dashboard and click on Developers > Webhooks.\
Click on "Add destination" and select the following events:
```
customer.subscription.created
customer.subscription.updated
customer.subscription.deleted
invoice.paid
```
Click "Continue" and select "Webhook endpoint" as destination type.
As "Endpoint URL" insert the value `https:///api/webhooks/stripe` and continue.
At this point the Webhook has been created.
Click on the Webhook, copy the `Signing secret` and paste it in `.env` as the value of `STRIPE_WEBHOOK_SECRET`.
### Get the Stripe keys
To correctly interact with Stripe, you need to configure two other environment variables: STRIPE\_SECRET\_KEY and STRIPE\_PUBLIC\_KEY.
Go to the [Stripe Dashboard > Developers > API Keys](https://dashboard.stripe.com/apikeys).\
Copy the value of **Publishable Key** and set it to STRIPE\_PUBLIC\_KEY.\
Copy the value of **Secret Key** and set it to STRIPE\_SECRET\_KEY.
### Enable Stripe in Shipped
Edit the file `src/config/config.ts` and set `paymentProvider` to "stripe".
This will affect the Billing button across your SaaS, when a user clicks it, Shipped retrieves the customer portal URL and opens it.
### Test mode
Stripe supports a test mode, which is an exact replica of your Stripe account, but that can be used to perform tests.\
This means you'll have to create new products, and set the test keys for the test mode to work with your code.
To execute a purchase, use the credit card number 4242 4242 4242 4242 at checkout.
### Customize the logic
All the logic of the webhook is contained into `src/app/api/webhooks/stripe/route.ts`\
If you need additional logic like, sending emails, and so on, it's the right place to update.
### Test your local webhook
When you develop some changes, it's comfortable to test if they work locally, before pushing to production.
1. Run your project with `npm run dev` and run the stripe cli with\
`stripe listen --forward-to localhost:3000/api/webhooks/stripe`
2. Copy the webhook signing secret from the terminal and set it to `STRIPE_WEBHOOK_SECRET`
3. Then open a Stripe payment link and execute a payment
4. Your local webserver will be called
# Private pages
If you need to authenticate your users, you probably need to give them access to a private section of the website.
Shipped provides patterns to handle private pages.
### Authenticated pages
These are pages accessible only if a user is logged in.
Use the NextAuth hook `useSession` you retrieve the current user session, and if they are logged in or not.
{% code title="src/app/dashboard/page.tsx" %}
```typescript
"use client";
import { Button, Center, Spinner, Stack, Text } from "@chakra-ui/react";
import { useSession } from "next-auth/react";
const Dashboard = () => {
const { data: session, status } = useSession();
return (
)}
{status === "unauthenticated" && (
Sign in to access
)}
);
};
export default Dashboard;
```
{% endcode %}
### Authenticated API endpoints
These are API endpoints that are protected and only logged in users can call them and get a correct response.
{% code title="src/app/api/user/route.ts" %}
```typescript
import { NextRequest, NextResponse } from "next/server";
import { getServerSession } from "next-auth/next";
import { authOptions } from "../auth/[...nextauth]/route";
import { HttpStatusCode } from "axios";
import { prismaClient } from "@/prisma/db";
export async function POST(req: NextRequest) {
const session = await getServerSession(authOptions);
if (!session || !session?.user?.email) {
return NextResponse.json(
{ error: "Unauthorized" },
{ status: HttpStatusCode.Unauthorized } // 401
);
}
if (session && session?.user?.email) {
const user = await prismaClient.user.findFirst({
where: {
email: session?.user?.email,
},
});
if (!user) {
return NextResponse.json(
{ error: "Unauthorized" },
{ status: HttpStatusCode.Unauthorized } // 401
);
}
if (user) {
return NextResponse.json({ user }, { status: HttpStatusCode.Ok }); // 200
}
}
}
```
{% endcode %}
### How to add a new private page
{% embed url="" %}
How to add a new page
{% endembed %}
As an example, let's say we want to add a new section to our SaaS, at `/todo` to show a simple todo app.
Add the new route to the file `src/data/routes.ts`
{% code title="src/data/routes.ts" %}
```typescript
export enum Routes {
/* ... */
todo = "/todo",
}
```
{% endcode %}
Create a new folder in `src/app` and call it `todo`.
Create a new file, called `page.tsx` inside the `todo` folder.
In the `page.tsx`, add a code similar to this
{% code title="src/app/todo/page.tsx" %}
```typescript
import { WebAppPage } from "@/components/templates/WebAppPage/WebAppPage";
import { Routes } from "@/data/routes";
const TodoPage = () => {
return ;
};
export default TodoPage;
```
{% endcode %}
Open the component `` at `src/components/templates/WebAppPage/WebAppPage.tsx` and scroll down.
Render your new page, when the current page is `Routes.todo`
```jsx
{currentPage === Routes.dashboard && (
)}
{currentPage === Routes.todo && (
)}
{/* Add the route components here */}
```
To add the new menu item to the sidebar, open `src/components/organisms/Sidebar/SidebarMenuItems.tsx` scroll to the MenuItem, and add a new element:
{% code title="src/components/organisms/Sidebar/SidebarMenuItems.tsx" %}
```jsx
```
{% endcode %}
Your menu item will now appear in the sidebar:
Todo page in the sidebar
# SEO
It's important to include the right metadata tags information for each page.\
\
The most common are `title` and `description`, but you can customize the open graph preview image, and the social network cards.
The `layout.tsx` page already contains default metadata, taking data from the `config.ts` file.
{% code title="src/app/layout.tsx" %}
```typescript
export const metadata: Metadata = {
...getSEOTags({
metadataBase: new URL(websiteUrl),
title: landingPageTitle,
description: landingPageDescription,
}),
...getOpenGraph({
title: landingPageTitle,
description: landingPageDescription,
imageUrl: openGraphImageUrl,
websiteUrl,
twitterImageUrl: openGraphImageUrl,
twitterHandle: "",
twitterMakerHandle: "",
}),
};
```
{% endcode %}
You can override the default meta tags, by exporting a metadata object in a `pages.tsx` file.
# shadcn/ui
[shadcn/ui](https://ui.shadcn.com/) is a popular UI components library based on Radix and TailwindCSS.
It includes several well-designed components, and Shipped already supports it out of the box.
### How to install a shadcn/ui component
To do that, follow the instructions on the [official documentation of shadcn/ui](https://ui.shadcn.com/docs/components/accordion) for each component you want to add.
# Supabase
[Supabase](https://supabase.com/) is a popular open-source platform (Firebase alternative) that provides many interesting services, like, Authentication, Postgres Database, Realtime database, Edge functions, REST API, GraphQL, and so on.
Shipped supports Supabase Auth with these methods:
\- magic link auth\
\- email and password\
\- SSO (social login)
Due to the many changes that affect the codebase of Shipped, there is a dedicated branch called `supabase`. If you intend to use Supabase Auth, move to the `supabase` branch and start working on top of it.
Move to the `supabase` branch:
{% code title="terminal" %}
```bash
git checkout supabase
```
{% endcode %}
## Supabase get started
To use Supabase, start creating a new Supabase project at
Configure the default Site URL and Redirect URLs under Authentication > URL Configuration on Supabase.
Supabase Authentication > URL Configuration
### Environment variables
Once done, you need to set two environment variables:
{% code title=".env" %}
```yaml
NEXT_PUBLIC_SUPABASE_URL=""
NEXT_PUBLIC_SUPABASE_ANON_KEY=""
```
{% endcode %}
You can retrieve the values from
We have dedicated guides about the setup of Supabase Auth:
* [Supabase Auth](/features/authentication/supabase-auth)
* [Supabase Magic Link](/features/authentication/supabase-auth/supabase-magic-link)
* [Supabase Email & Password](/features/authentication/supabase-auth/supabase-email-and-password)
* [Supabase Authentication Flow](/features/authentication/supabase-auth/supabase-authentication-flow)
## Supabase Postgres
Supabase provides a Postgres database to get started and for free.
If you want to use it in your Shipped-based SaaS, follow these instructions.
You need to set two environment variables `DATABASE_URL` and `DIRECT_URL`.
To retrieve them go to your Supabase project (click here ) and click on the "Connect" button.
In the modal, click on the **ORMs** tab and select **Prisma.**
Below you'll find the two environment variables, copy the values and paste them into your local `.env` file. Just remember to replace `[YOUR-PASSWORD]` with the password you set for your database.
{% hint style="info" %}
Remember to set `DATABASE_URL` and `DIRECT_URL` to your hosting service as well.
{% endhint %}
After this step, click on the `prisma/schema.prisma` tab in the Supabase modal, and copy the content.\
Paste it into your local `schema.prisma` file, removing any duplicates.
{% code title="prisma/schema.prisma" %}
```prisma
generator client {
provider = "prisma-client-js"
}
datasource db {
provider = "postgresql"
url = env("DATABASE_URL")
directUrl = env("DIRECT_URL")
}
```
{% endcode %}
The `DATABASE_URL` is used when you run your application, while `DIRECT_URL` is used by the `npx prisma` commands, like `db push` or `migrate`.
You're now setup with your Supabase Postgres database 🎉
## Custom domain
You can configure your custom domain in Supabase, so that when a user logs in, instead of the supabase domain, they will see your domain.
This is not mandatory, and this is a paid feature of Supabase, you can find more information on the official [Supabase documentation](https://supabase.com/docs/guides/platform/custom-domains).
Google sign in page with a Supabase default domain
# Workspace / Organizations
Shipped comes with support for Workspace / Organizations.
They are collections of users that you can use to let the users organize their teams.
For instance, if they are all part of the same company, i.e. "Acme Inc.", you can allow them to create an organization and invite other users to it, with specific roles (Owner, Admin, Member, Guest).
## Create a workspace / organization
Use the component ``.
It is a modal with an input field.
The route POST `/api/workspace` handles the workspace creation.
Create workspace modal
## Add a workspace / organization member
Use the component ``.
It is a modal with email and role.
Add member to workspace / organization
The route POST `/api/workspace/invite` handles the workspace invitation.
It sends an email to the target email.
If the user doesn't have an account (never signed up) it is added to the table WorkspacePendingInvitation, otherwise to the table WorkspaceUsers.\
\
If a user is pending an invitation, when he or she signs up, the user is automatically moved from the WorkspacePendingInvitation table to the WorkspaceUsers one.
## Additional routes
`GET /api/workspace/[id]/invitations` — Get invitations to a workspace\
`DELETE /api/workspace/[id]/invitations` — Delete invitation to a workspace\
`GET /api/workspace/[id]/members` — Get members of a workspace\
`DELETE /api/workspace/[id]/members` — Delete member of a workspace\
`PUT /api/user/role` — Update the role of a member
# AccountMenu
Show a menu button for the authenticated users
AccountMenu
The AccountMenu is a menu to be used in the authenticated section of your product.
The **Billing** menu automatically retrieves the Customer Portal page URL from Lemon Squeezy, and opens it.\
From that page, the users can manage the subscription plans purchased on your store and update the payment method.
The route defined at`src/app/api/subscriptions/route.ts` is used to retrieve the Customer Portal URL, and a subscription must be active for the current user.
The second menu option is the Log out button, which redirects the users to the root of your website when clicked.
### Lemon Squeezy API Key
To use the Lemon Squeezy API, you need an API key.
Go to your Lemon Squeezy store, Settings, API, and generate a new API key.
Open `.env` and set a new variable (remember set it into your hosting service as well):
{% code title=".env" %}
```yaml
LEMONSQUEEZY_API_KEY=""
```
{% endcode %}
Component: ``\
File: `src/components/AccountMenu/AccountMenu.tsx`
{% code title="page.tsx" %}
```jsx
import { AccountMenu } from "@/components/AccountMenu/AccountMenu";
/* ... */
```
{% endcode %}
***
{% hint style="info" %}
If you need basic components like buttons, inputs, grids, etc, they are all available with [ChakraUI](https://chakra-ui.com/).
{% endhint %}
# CtaBox
Call to Action box
Call to Action box
The Call to Action box is a section to be usually placed at the end of the page.\
When the users scroll through the page, you try to communicate the value of your product and convince them to sign up or purchase.
The CtaBox is the component that attracts attention with the main color and drives them to the action that matters the most for you.
Component: ``\
File: `src/components/CtaBox/CtaBox.tsx`
{% code title="page.tsx" %}
```
import { CtaBox } from "@/components/CtaBox/CtaBox";
```
{% endcode %}
### Example
***
{% hint style="info" %}
If you need basic components like buttons, inputs, etc, they are all available with [ChakraUI](https://chakra-ui.com/) and [shadcn/ui](https://ui.shadcn.com/)
{% endhint %}
# DarkModeSwitch
Toggle the light and dark mode.
Components: ``
File: `src/components/DarkModeSwitch/DarkModeSwitch.tsx`
```
import { DarkModeSwitch } from "@/components/DarkModeSwitch/DarkModeSwitch";
```
### Example
{% embed url="" %}
# Explainer video
A component to include a section with your video in which you show your product, or just a recording of yourself explaining why they should buy your product.\
\
I use [Screen Studio](https://screenstudio.lemonsqueezy.com?aff=O9Xdy) for all my screen recordings. It is a product made by indie hackers as well.
Component: ``\
File: `src/components/ExplainerVideo/ExplainerVideo.tsx`
{% code title="page.tsx" %}
```typescript
import { ExplainerVideo } from "@/components/ExplainerVideo/ExplainerVideo";
```
{% endcode %}
***
{% hint style="info" %}
If you need basic components like buttons, inputs, etc, they are all available with [ChakraUI](https://chakra-ui.com/).
{% endhint %}
# FAQ
Frequently Asked Questions
Frequently Asked Questions
It is important to try to reply to the most common questions, right on the landing page.
Each question can be expanded to show the answer.
Configure the support email into the config file, by defining `supportEmail`
Component: ``\
File: `src/components/FAQ/FAQ.tsx`
{% code title="page.tsx" %}
```typescript
import { FAQ } from "@/components/FAQ/FAQ";
```
{% endcode %}
### Example
userdesk.io
***
{% hint style="info" %}
If you need basic components like buttons, inputs, etc, they are all available with [ChakraUI](https://chakra-ui.com/).
{% endhint %}
# Features
Show the features of your product
The file contains an array of features and renders them all.
```typescript
const featuresList: Omit[] = [
{
category: "Productivity",
title: "Feature 1",
description:
"Lorem ipsum dolor sit amet, consectetur adipiscing elit. Sed euismod, diam sit amet dictum ultrices, nunc magna ullamcorper elit, vitae tincidunt nisl nunc sit amet nunc. ",
imageUrl: "https://placehold.co/600x400",
},
{
category: "Leads generation",
title: "Feature 2",
description:
"Lorem ipsum dolor sit amet, consectetur adipiscing elit. Sed euismod, diam sit amet dictum ultrices, nunc magna ullamcorper elit, vitae tincidunt nisl nunc sit amet nunc. ",
imageUrl: "https://placehold.co/600x400",
},
];
```
Component: ``
File: `src/components/Features/Features.tsx`
{% code title="page.tsx" %}
```typescript
import { Features } from "@/components/Features/Features";
```
{% endcode %}
### Props
| Prop | Type | Description |
| ------- | ------- | --------------------------------- |
| showCta | boolean | Shows or hides the call to action |
Examples
userdesk.io
***
{% hint style="info" %}
If you need basic components like buttons, inputs, etc, they are all available with [ChakraUI](https://chakra-ui.com/).
{% endhint %}
# Footer
The footer section is used on the pages of your marketing (public) website.
It includes the links to the other sections of your website.
Footer
Component: ``
File: `src/components/Footer/Footer.tsx`
{% code title="page.tsx" %}
```typescript
import { Footer } from "@/components/Footer/Footer";
```
{% endcode %}
# Header
The header of the website
The header section is used on the pages of your marketing (public) website.
It includes your logo and brand, and the navigation menus.
The navigation menu can point to another page or to a section of the current page.
Component: ``
File: `src/components/Header/Header.tsx`
{% code title="page.tsx" %}
```typescript
import { Header } from "@/components/Header/Header";
```
{% endcode %}
{% hint style="info" %}
To use your own logo, place it here `/public/logo.png`
{% endhint %}
***
{% hint style="info" %}
If you need basic components like buttons, inputs, etc, they are all available with [ChakraUI](https://chakra-ui.com/).
{% endhint %}
# Hero
The hero section of your landing page
Designed for the landing pages, the hero goes at the top of your page.
It includes:
* a headline to show the problem solved, or the transformation you'll allow your customers to achieve.
* a strong Call to Action (Try FREE now).
* optionally, a "Talk to us" button (or Book a demo), you can define the Calendly link in the `config.ts` file.
* a testimonials section, if you already have customers, show their avatars.
* a placeholder for your product image (I use [Figma](https://figma.com/) to design, but I know that [Canva](https://www.canva.com/) is a great product too).
Component: ``\
File: `src/components/Hero/Hero.tsx`
{% code title="page.tsx" %}
```typescript
import { Hero } from "@/components/Hero/Hero";
```
{% endcode %}
### Props
The Hero component has a few props
| Prop | Type | Description |
| ------------ | ------- | -------------------------------------------- |
| showBookDemo | boolean | Shows or hides the "Talk to us" button |
| showCta | boolean | Shows or hides the Call to Action button |
| showUsers | boolean | Shows or hides the testimonial users section |
### Examples
Some examples of hero sections from my products:
userdesk.io
inboxs.io
hivoe.com
usewuf.com
omniwrite.ai
***
{% hint style="info" %}
If you need basic components like buttons, inputs, etc, they are all available with [ChakraUI](https://chakra-ui.com/).
{% endhint %}
# Lifetime
Lifetime deal component
Perfect for pre-sales or pre-order landing pages.
Lifetime deals
The component is called `` and defined in `src/components/Lifetime.tsx`
It renders a certain amount of `lifetimeDeals`.
To configure the lifetime deals, open `src/config/lifetime.constants.ts` and set the title, price, checkout URL (take it from LemonSqueezy), and features.
Component: ``\
File: `src/components/Lifetime/Lifetime.tsx`
{% code title="page.tsx" %}
```
import { Lifetime } from "@/components/Lifetime/Lifetime";
```
{% endcode %}
***
{% hint style="info" %}
If you need basic components like buttons, inputs, etc, they are all available with [ChakraUI](https://chakra-ui.com/).
{% endhint %}
# Pricing
Use this component to show the subscription plans of your product.
Pricing plans
The component is called `` and defined in `src/components/Pricing.tsx`
To configure the subscription plans, open `src/config/pricing.constants.ts` and set the plan title, monthly and annual price, the checkout URLs (take them from LemonSqueezy), and features.
Component: ``\
File: `src/components/Pricing/Pricing.tsx`
{% code title="page.tsx" %}
```typescript
import { Pricing } from "@/components/Pricing/Pricing";
```
{% endcode %}
***
{% hint style="info" %}
If you need basic components like buttons, inputs, etc, they are all available with [ChakraUI](https://chakra-ui.com/).
{% endhint %}
# Sales Notification
The SalesNotification component is a marketing tool to show the visitors of your website that they are not the first and new customers of our product.
SalesNotifications of Shipped
Component: ``
File: `src/components/molecules/SalesNotifications/SalesNotifications.tsx`
{% code title="page.tsx" %}
```tsx
import { SalesNotifications } from "@/components/molecules/SalesNotifications/SalesNotifications";
```
{% endcode %}
***
{% hint style="info" %}
If you need basic components like buttons, inputs, etc, they are all available with [ChakraUI](https://chakra-ui.com/) and [shadcn/ui](https://ui.shadcn.com/)
{% endhint %}
# Secondary Sidebar Pages
With this component, you can create a secondary sidebar, inside a page.
It is useful if you have additional sections inside a page, like for advanced settings.
Component: ``
File: `src/components/molecules/SecondarySidebarPages/SecondarySidebarPages.tsx`
### Instructions
1. Configure the sections:
```typescript
type Sections = "section1" | "section2" | "section3";
```
2. Set the correct page path:
```typescript
const pagePath = "/dashboard";
```
3. Update the content of each section with the React components that you want to render
```typescript
{currentSection === "section1" && Section}
{currentSection === "section2" && Layout}
{currentSection === "section3" && (
Box model
)}
{/* add more sections here */}
```
4. Add the `SecondarySidebarPages` component to a route in `WebAppPage`:
```typescript
{currentPage === Routes.dashboard && }
```
If you need to create another page with a secondary sidebar, duplicate the file, call the component `SecondarySidebarPages2` (or any other more meaningful name), and use it in `WebAppPage`.
# Sidebar
Help the users navigate through your product
Sidebar in action
Component: ``
File: `src/components/Sidebar/Sidebar.tsx`
Usage
```jsx
import { SideBar } from "@/components/organisms/Sidebar/Sidebar";
```
| Prop | Type | Description |
| ----------- | ------ | ---------------------- |
| currentPage | Routes | The current page Route |
Example:
# Tabs
A set of content sections—tab panels— displayed one at a time
Tabs
Component: ``
File: `src/components/Tabs/Tabs.tsx`
Usage
```typescript
import { FAQ } from "@/components/FAQ/FAQ";
const tabItems = [
{
value: "tab1",
label: "Account",
icon: ,
tabContent: Account
},
{
value: "tab2",
label: "Payments",
icon: ,
tabContent: Payment settings
}
]
console.log(tabValue)}
/>
```
Code to get the same result as the GIF at the top of the page.
```jsx
,
tabContent: (
Payment method
Update your payment method.
Credit card
),
},
{
value: "features",
label: "Account",
icon: ,
tabContent: (
Account
Update your details.
Name
),
},
{
value: "password",
icon: ,
tabContent: (
Password
Update your password.
Current password
New password
),
},
]}
/>
```
# Testimonials
Show the testimonial messages from your customers
***
{% hint style="info" %}
If you need basic components like buttons, inputs, etc, they are all available with [ChakraUI](https://chakra-ui.com/).
{% endhint %}
# Waitlist
Collect emails for wait list of newsletter.
This component can be used for a waitlist landing page, or to collect the email of users for your newsletter (just update the copy).
Email collection
When the user hits the "Remind me" button, we call the `/api/waitlist` endpoint.
To set up the email collection service, open `src/app/api/waitlist/route.ts`
Component: ``\
File: `src/components/Waitlist/Waitlist.tsx`
{% code title="page.tsx" %}
```typescript
import { Waitlist } from "@/components/Waitlist/Waitlist";
```
{% endcode %}
### MailChimp
Remember to set the environment variable `MAILCHIMP_AUDIENCE_LIST_ID` into the `.env` file (or your online service like Vercel, Netlify, Render, etc).
Add this code to `src/app/api/waitlist/route.ts`
```typescript
import { addMailChimpListMember } from "@/libs/mailchimp";
import type { NextApiRequest, NextApiResponse } from "next";
type ResponseData = {
result: boolean;
};
export async function POST(req: Request) {
const body = await req.json();
const email = body.email;
if (email) {
addMailChimpListMember({
email,
firstName: "",
lastName: "",
tags: ["waitlits"],
});
}
return Response.json({ result: true });
}
```
***
### Loops
Remember to set the environment variable `LOOPS_API_KEY` into the `.env` file (or your online service like Vercel, Netlify, Render, etc).
Add this code to `src/app/api/waitlist/route.ts`
```typescript
import { createLoopsContact } from "@/libs/loops";
import type { NextApiRequest, NextApiResponse } from "next";
type ResponseData = {
result: boolean;
};
export async function POST(req: Request) {
const body = await req.json();
const email = body.email;
if (email) {
createLoopsContact({
email,
firstName: "",
lastName: "",
userGroup: "Waitlist",
});
}
return Response.json({ result: true });
}
```
***
### Enable reCaptcha
When you launch a waitlist, it is usually public.
This means that your website and the waitlist endpoint is subject to abuse by someone with malicious intent.
To prevent this, the waitlist form and endpoint comes with support to reCaptcha by Google, which is preset by default.
\
These are the instructions to correctly configure it.
* Visit
* Create a project and add your domain and `localhost` for local development
* Copy the captcha site key and captcha secret key values and use them in the `.env` file:
{% code title=".env" %}
```properties
NEXT_PUBLIC_RECAPTCHA_SITE_KEY=""
RECAPTCHA_SECRET_KEY=""
```
{% endcode %}
* Finally, open `src/app/layout.tsx` and uncomment the script HTML tag that includes
{% code title="src/app/layout.tsx" %}
```tsx
```
{% endcode %}
ReCaptcha should now work correctly.
***
{% hint style="info" %}
If you need basic components like buttons, inputs, etc, they are all available with [ChakraUI](https://chakra-ui.com/).
{% endhint %}
# WebAppPage
Easily render the pages of your Micro SaaS web app.
When a user logs into your product, they access to your web app.
By default, Shipped redirects the users to the `/dashboard` page.
The dashboard page is an example of web app page with the sidebar (that's responsive and hides on mobile).
Default /dashboard page
If you want to reuse this template for all the pages of your web app, it's strongly recommended to re-use the `` component.
The `` component is a template component that includes:
* the sidebar
* the content to be replaced with your React components, according to the current route
## How to add a new web app route
Let's say you want to add a settings page, to let the users set their preferences.
The route you want is `/settings`, to get it you need to:
* Create the route `settings` into `Routes` at `src/data/routes.ts`
{% code title="src/data/routes.ts" %}
```typescript
export enum Routes {
/* ... */
settings = "/settings",
/* ... */
}
```
{% endcode %}
* Create the file `src/app/settings/page.tsx`
* Paste this content (notice `currentPage` set to `Routes.settings`):
{% code title="src/app/settings/page.tsx" %}
```tsx
import { WebAppPage } from "@/components/templates/WebAppPage/WebAppPage";
import { Routes } from "@/data/routes";
const SettingsPage = () => {
return ;
};
export default SettingsPage;
```
{% endcode %}
* Update the component ``, scroll down where the routes are handled and add your custom content
{% code title="src/components/templates/WebAppPage/WebAppPage.tsx" %}
```tsx
{currentPage === Routes.dashboard && (
Welcome
)}
{/* Add the route components here */}
```
{% endcode %}
For instance add this code (notice that UserSettings is not provided by Shipped, it is used as an example here):
```tsx
{currentPage === Routes.settings && (
)}
```
# Deployment
Deploying the app is very simple, you have different options that I will describe to you.
You can use services like [Vercel](https://vercel.com/) (my favorite), [Netlify](https://www.netlify.com/), or [Render](https://render.com/), or even self-host it on your server if you prefer.
## 5 minutes deploy
These are the steps:
1. Create a private Git repository using [GitHub](https://github.com/) (my favorite), [GitLab](https://about.gitlab.com/), [BitBucket](https://bitbucket.org/product?\&aceid=\&adposition=\&adgroup=146041806431\&campaign=18815940430\&creative=632894031558\&device=c\&keyword=bitbucket\&matchtype=e\&network=g\&placement=\&ds_kids=p74116832382\&ds_e=GOOGLE\&ds_eid=700000001551985\&ds_e1=GOOGLE\&gad_source=1\&gclid=CjwKCAiAvJarBhA1EiwAGgZl0GjqRKbDALOkeJW4nGvLQqob7gquXy1JIeXCRzB_YAJc0nbWrGHvlRoC6MoQAvD_BwE\&gclsrc=aw.ds), or your favorite service.
2. Add the **Shipped** folder to your Git repository (details below)
3. Sign up for Vercel and publish your website in 1-click.
#### 2. How to add the Shipped folder to your Git repository.
Open the Terminal, go to the Shipped folder, and run these commands:
{% code title="terminal" %}
```bash
# unlink the Shipped git repository
git remote remove origin
# add your git repository as a remote
git remote add origin
```
{% endcode %}
Now, when you create a new commit and push it, the new code will go to your Git repository.
If you linked Vercel, Netlify, or Render, each pushed commit to the `main` branch will trigger a new release.
If you haven't already, sign up to Vercel and connect your GitHub repository.
If you reached this point, your product is live, congrats! 🚀
{% hint style="success" %}
Share your product with me if you want it to be featured on the website of **Shipped**!
{% endhint %}
## Self-hosting
{% hint style="info" %}
This configuration is for skilled engineers, and it takes more time.
{% endhint %}
Running your app is as simple as running this command `npm run start` in the Shipped folder.
This means that you can upload your code to a remote server (like an AWS EC2 or Hetzner instance) and run this command. Your website will be available on port 3000 (but you can customize it with the option `-p `).
# Configuration
The configuration of your application is centralized in the folder `src/config`
There, you find 4 files:
* config.ts
* auth.ts
* pricing.constants.ts
* lifetime.constants.ts
## config.ts
It is where the main configuration variables of your product live.
By updating one of these variables, the value will be updated across all the application
{% code title="src/config/config.ts" %}
```typescript
export const brandName = "My App";
export const landingPageTitle = "My App";
export const landingPageDescription = "Make money today with My App";
export const websiteUrl = "https://myapp.com";
export const supportEmail = "support@email.com";
// the users will be redirected to this page after sign in
export const signInCallbackUrl = "/dashboard";
// only needed if you have the "talk to us" button in the landing page
export const demoCalendlyLink = "https://calendly.com/myself/15min";
// used by MailChimp
export const emailFrom = "no-reply@email.com";
// social links
export const discordLink = "https://discordlink";
export const twitterLink = "https://x.com/johndoe";
export const youTubeLink = "https://youtube.com/johndoe";
export const affiliateProgramLink =
"https://yourstore.lemonsqueezy.com/affiliates";
```
{% endcode %}
## auth.ts
This is where the authentication configuration lives.
Update it if you want to add new social authentication providers, or add new events.
The format of this configuration is from NextAut, check their [documentation](https://next-auth.js.org/configuration/initialization) to learn more.
## pricing.constants.ts
Where the pricing plans are defined, with all the details.
This configuration is used by the `` component.
{% code title="src/config/pricing.constants.ts" %}
```typescript
export const pricingPlans = [
{
title: "Hobby",
monthlyPrice: 19,
annualPrice: 199,
monthlyCheckoutUrl: "https://...",
annualCheckoutUrl: "https://...",
features: ["Team", "Workspace", "Integrations"],
},
{
title: "Growth",
monthlyPrice: 49,
annualPrice: 499,
monthlyCheckoutUrl: "https://...",
annualCheckoutUrl: "https://...",
features: ["Team", "Workspace", "Integrations", "Custom branding"],
},
{
title: "Pro",
monthlyPrice: 99,
annualPrice: 999,
monthlyCheckoutUrl: "https://...",
annualCheckoutUrl: "https://...",
features: ["Team", "Workspace", "Integrations", "Custom branding", "API"],
},
];
```
{% endcode %}
## lifetime.constants.ts
Where the lifetime deals are defined, with all the details.
This configuration is used by the `` component.
{% code title="" %}
```typescript
export const lifetimeDeals = [
{
title: "Hobby",
price: 199,
checkoutUrl: "https://...",
features: ["Team", "Workspace", "Integrations"],
},
{
title: "Growth",
price: 499,
checkoutUrl: "https://...",
features: ["Team", "Workspace", "Integrations", "Custom branding"],
},
{
title: "Pro",
price: 999,
checkoutUrl: "https://...",
features: ["Team", "Workspace", "Integrations", "Custom branding", "API"],
},
];
```
{% endcode %}
# Changelog widget
Use canny to show the product changelog updates
I've used a product called [Canny](https://canny.io/?ref=shipped.club) to show a Changelog widget inside my products.
To integrate Canny into your Next.js app you need to apply this changes.
1. update layout.tsx
{% code title="app/layout.tsx" %}
```jsx
import Script from "next/script";
/* .... */
useEffect(() => {
// @ts-ignore
if (window?.Canny) {
// @ts-ignore
Canny("initChangelog", {
appID: "",
});
}
// @ts-ignore
}, [typeof window === "undefined"]);
/* .... */
```
{% endcode %}
2. And add the HTML data attribute `data-canny-changelog` to the button that will trigger the Changelog pop-up.
Your Changelog widget should now be ready.
# Favicon
Shipped is already configured with a default favicon (the Shipped icon, but green).
To replace it with your icon I suggest using the [Favicon Generator](https://realfavicongenerator.net/).
1. upload your image
2. download the zip package with all the icons
3. unzip the file and place all the files into the folder `src/app`
All the icons will be updated.
For reference, the favicons are included in
{% code title="src/app/layout.tsx" %}
```html
```
{% endcode %}
# Google Fonts
Next.js provides an easy way to include any Google Font into a website.
Shipped is currently configured to use Inter.
This is how, and how you can change it.
{% code title="src/app/layout.tsx" %}
```tsx
import { Inter } from "next/font/google";
const inter = Inter({ subsets: ["latin"] });
/* ... */
{children}
```
{% endcode %}
If you want to change the font family, you can do for instance
```tsx
import { Outfit } from "next/font/google";
const outfit = Outfit({ subsets: ["latin"] });
/* ... */
{children}
```
Landing page with Outfit Google Font
# Sitemap
Shipped is equipped with next-sitemap to automatically generate the sitemap.xml file on build.
Update the siteUrl in the next-sitemap configuration file
{% code title="next-sitemap.config.js" %}
```javascript
/** @type {import('next-sitemap').IConfig} */
module.exports = {
siteUrl: "https://myapp.com", // <-- set your website url
generateRobotsTxt: true, // (optional)
// ...other options
};
```
{% endcode %}
To generate the sitemap, simply run
{% code title="terminal" %}
```
npm run build
```
{% endcode %}
To know all the possible options, see the [documentation of next-sitemap](https://github.com/iamvishnusankar/next-sitemap#readme)
# Theme
Customize the theme to match your branding
The color palette of your brand is defined by these variables:
{% code title="src/theme.ts" %}
```typescript
export const colors = {
brand: {
50: theme.colors.teal["50"],
100: theme.colors.teal["100"],
200: theme.colors.teal["200"],
300: theme.colors.teal["300"],
400: theme.colors.teal["400"],
500: theme.colors.teal["500"],
600: theme.colors.teal["600"],
700: theme.colors.teal["700"],
800: theme.colors.teal["800"],
900: theme.colors.teal["900"],
},
};
```
{% endcode %}
By default, the brand color is defined with the teal color palette of ChakraUI.
To create the color palette of your brand color, you can use \
Set the gray color to your brand color (I used purple), and get all the shades of the color palette 👇
{% embed url="" %}
Generate a color palette
{% endembed %}
Now you can copy the colors into the brand colors.
### TailwindCSS
If you want to use the same brand color via TailwindCSS class names, edit the `tailwind.config.ts` file and add the brand colors. Replace the HEX value with your brand color, as regenerated via Themera.
{% code title="tailwind.config.ts" %}
```typescript
/** @type {import('tailwindcss').Config} */
module.exports = {
theme: {
extend: {
colors: {
'brand': {
50: '#cffafe',
100: '#cffafe',
200: '#cffafe',
300: '#cffafe',
400: '#cffafe',
500: '#cffafe',
600: '#cffafe',
700: '#cffafe',
800: '#cffafe',
900: '#cffafe',
},
},
},
}
}
```
{% endcode %}
You can now use the brand colors via class names, i.e. `text-brand-500`


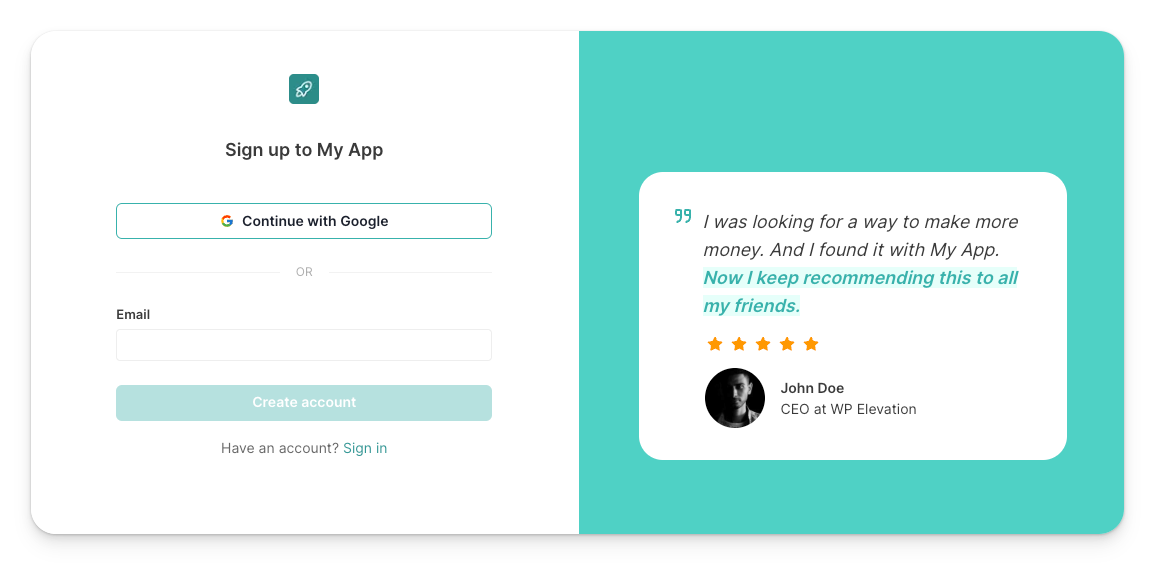
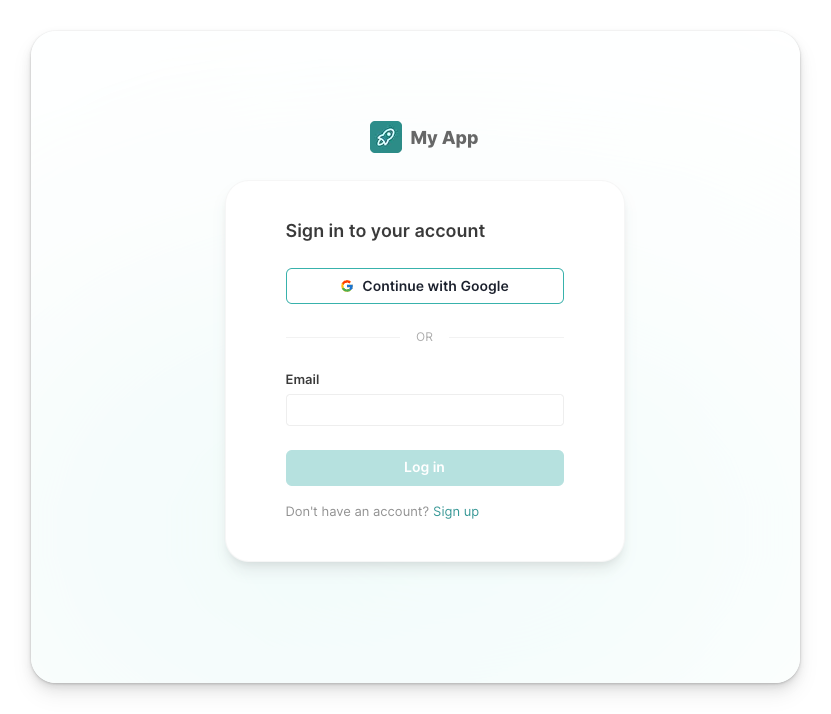





.png?alt=media&token=c9e6458b-97dc-445a-a396-322736ebf2e6)